
注:1.imageai目前(2020年03月23日)不支持tensorflow2.0,官方帮助文档:https://imageai.readthedocs.io/en/latest/detection/index.html
2.网卡必须为Navidia,并且计算能力为3.0以上才行。计算能力查询:https://developer.nvidia.com/cuda-gpus#collapseOne
3.tensorflow-gpu版本与python版本、CUDA版本、cuDNN版本必须一一对应,否则无法调用。查询地址:https://www.tensorflow.org/install/source_windows。(tensorflow-gpu与CUDA、cuDNN的对应关系可以自动处理,见下文环境配置章节第4步【安装tensorflow-gpu=1.10.0】)
4.必须安装驱动,驱动下载地址:https://www.nvidia.cn/Download/index.aspx?lang=cn

一、环境配置
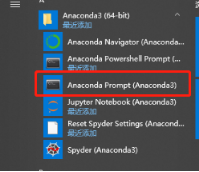
下载并安装驱动(略) 1.下载Anaconda3,我下载的是Anaconda3-2020.02-Windows-x86_64.exe版本,默认Python3.7.6。 2.点击【开始】【Anaconda Prompt】。
 3.创建及激活虚拟环境
添加国内镜像源,下载包的速度更快
conda config --add channels https://mirrors.tuna.tsinghua.edu.cn/anaconda/pkgs/free/
conda config --add channels https://mirrors.tuna.tsinghua.edu.cn/anaconda/pkgs/main/
conda config --set show_channel_urls yes
创建虚拟环境
conda create -n env2 python=3.6.1激活虚拟环境
activate env2后续的所有安装都在env2环境下 4.安装tensorflow-gpu=1.10.0
conda install tensorflow-gpu=1.10.0此命令可自动完成cuda和cudnn的安装。

5.安装Keras==2.1.6
pip install Keras==2.1.6 -i http://mirrors.aliyun.com/pypi/simple --trusted-host mirrors.aliyun.com 6.安装opencv-python
pip install opencv-python -i http://mirrors.aliyun.com/pypi/simple --trusted-host mirrors.aliyun.com7.安装imageai
pip install imageai -i http://mirrors.aliyun.com/pypi/simple --trusted-host mirrors.aliyun.com8.打开Spyter,点击菜单【Tools】【Preferences】,选择左边的【Python interpreter】,选择新创建环境下的python.exe,点击【OK】
 这时大概率会出现Your Python environment or installation doesn’t have the spyder-kernels module
 解决方法:
解决方法:
pip install spyder-kernels -i http://mirrors.aliyun.com/pypi/simple --trusted-host mirrors.aliyun.com至此,库及开发环境就配置好了,可以编写代码了。
二、代码编写与调试 1.在Spyter的temp.py中输入如下代码
import os
from imageai.Detection import ObjectDetection
import cv2

execution_path = os.getcwd()

detector = ObjectDetection()
detector.setModelTypeAsYOLOv3()
detector.setModelPath( os.path.join(execution_path , "yolo.h5"))
detector.loadModel()

cap = cv2.VideoCapture(0)
while True:
    ret, frame = cap.read()
    x, y = frame.shape[0:2]

    returned_image, detections = detector.detectObjectsFromImage(input_image=frame,input_type='array', output_type='array', minimum_percentage_probability=30)
    cv2.imshow("video", returned_image)
    if cv2.waitKey(1) & 0xFF == ord('q'):
        break

cap.release()
cv2.destroyAllWindows()
2.下载yolo.h5(下载地址:https://imageai.readthedocs.io/en/latest/detection/index.html)
 3.在temp.py上点击右键,选中【Show in external file explorer】,打开temp.py所在文件夹,将下载的yolo.h5放入到文件夹。
 4.运行程序,按q键可以退出。

 附: 虚拟环境中库及版本
Name
Version
Build
Channel
_tflow_select
2.1.0
gpu
https://mirrors.tuna.tsinghua.edu.cn/anaconda/pkgs/main
absl-py
0.9.0
py36_0
https://mirrors.tuna.tsinghua.edu.cn/anaconda/pkgs/main
astor
0.8.0
py36_0
https://mirrors.tuna.tsinghua.edu.cn/anaconda/pkgs/main
backcall
0.1.0
pypi_0
pypi
blas
1
mkl
https://mirrors.tuna.tsinghua.edu.cn/anaconda/pkgs/main
certifi
2019.11.28
py36_0
https://mirrors.tuna.tsinghua.edu.cn/anaconda/pkgs/main
cloudpickle
1.3.0
pypi_0
pypi
colorama
0.4.3
pypi_0
pypi
cudatoolkit
9
1
https://mirrors.tuna.tsinghua.edu.cn/anaconda/pkgs/main
cudnn
7.6.5
cuda9.0_0
https://mirrors.tuna.tsinghua.edu.cn/anaconda/pkgs/main
cycler
0.10.0
pypi_0
pypi
decorator
4.4.2
pypi_0
pypi
gast
0.3.3
py_0
https://mirrors.tuna.tsinghua.edu.cn/anaconda/pkgs/main
grpcio
1.12.1
py36h1a1b453_0
https://mirrors.tuna.tsinghua.edu.cn/anaconda/pkgs/main
h5py
2.10.0
pypi_0
pypi
icc_rt
2019.0.0
h0cc432a_1
https://mirrors.tuna.tsinghua.edu.cn/anaconda/pkgs/main
imageai
2.1.5
pypi_0
pypi
intel-openmp
2020
166
https://mirrors.tuna.tsinghua.edu.cn/anaconda/pkgs/main
ipykernel
5.2.0
pypi_0
pypi
ipython
7.13.0
pypi_0
pypi
ipython-genutils
0.2.0
pypi_0
pypi
jedi
0.16.0
pypi_0
pypi
jupyter-client
6.1.0
pypi_0
pypi
jupyter-core
4.6.3
pypi_0
pypi
keras
2.1.6
pypi_0
pypi
kiwisolver
1.1.0
pypi_0
pypi
libprotobuf
3.6.0
h1a1b453_0
https://mirrors.tuna.tsinghua.edu.cn/anaconda/pkgs/main
markdown
3.1.1
py36_0
https://mirrors.tuna.tsinghua.edu.cn/anaconda/pkgs/main
matplotlib
3.2.1
pypi_0
pypi
mkl
2020
166
https://mirrors.tuna.tsinghua.edu.cn/anaconda/pkgs/main
numpy
1.14.2
py36h5c71026_0
https://mirrors.tuna.tsinghua.edu.cn/anaconda/pkgs/main
opencv-python
4.2.0.32
pypi_0
pypi
parso
0.6.2
pypi_0
pypi
pickleshare
0.7.5
pypi_0
pypi
pillow
7.0.0
pypi_0
pypi
pip
20.0.2
py36_1
https://mirrors.tuna.tsinghua.edu.cn/anaconda/pkgs/main
prompt-toolkit
3.0.4
pypi_0
pypi
protobuf
3.6.0
py36he025d50_0
https://mirrors.tuna.tsinghua.edu.cn/anaconda/pkgs/main
pygments
2.6.1
pypi_0
pypi
pyparsing
2.4.6
pypi_0
pypi
python
3.6.1
2
https://mirrors.tuna.tsinghua.edu.cn/anaconda/pkgs/free
python-dateutil
2.8.1
pypi_0
pypi
pywin32
227
pypi_0
pypi
pyyaml
5.3.1
pypi_0
pypi
pyzmq
19.0.0
pypi_0
pypi
scipy
1.4.1
pypi_0
pypi
setuptools
46.0.0
py36_0
https://mirrors.tuna.tsinghua.edu.cn/anaconda/pkgs/main
six
1.14.0
py36_0
https://mirrors.tuna.tsinghua.edu.cn/anaconda/pkgs/main
spyder-kernels
1.9.0
pypi_0
pypi
tensorboard
1.10.0
py36he025d50_0
https://mirrors.tuna.tsinghua.edu.cn/anaconda/pkgs/main
tensorflow
1.10.0
gpu_py36h3514669_0
https://mirrors.tuna.tsinghua.edu.cn/anaconda/pkgs/main
tensorflow-base
1.10.0
gpu_py36h6e53903_0
https://mirrors.tuna.tsinghua.edu.cn/anaconda/pkgs/main
tensorflow-gpu
1.10.0
hf154084_0
https://mirrors.tuna.tsinghua.edu.cn/anaconda/pkgs/main
termcolor
1.1.0
py36_1
https://mirrors.tuna.tsinghua.edu.cn/anaconda/pkgs/main
tornado
6.0.4
pypi_0
pypi
traitlets
4.3.3
pypi_0
pypi
vc
14
0
https://mirrors.tuna.tsinghua.edu.cn/anaconda/pkgs/free
vs2015_runtime
14.16.27012
hf0eaf9b_1
https://mirrors.tuna.tsinghua.edu.cn/anaconda/pkgs/main
wcwidth
0.1.8
pypi_0
pypi
werkzeug
1.0.0
py_0
https://mirrors.tuna.tsinghua.edu.cn/anaconda/pkgs/main
wheel
0.34.2
py36_0
https://mirrors.tuna.tsinghua.edu.cn/anaconda/pkgs/main
wincertstore
0.2
py36h7fe50ca_0
https://mirrors.tuna.tsinghua.edu.cn/anaconda/pkgs/main
zlib
1.2.11
h8395fce_2
https://mirrors.tuna.tsinghua.edu.cn/anaconda/pkgs/main

