文章目录
创建队列
- 创建队列
- 创建交换器
- 分裂模式消息的发送
- 分裂模式消息的接收
- 测试
首先在queues中,创建如下三个队列 
在交换器中,创建如下的firstexchange交换器,类型选择为fanout,代表为分裂模式.  点击如下的交换器firstexchange,
  在下方的Bindings中,进行队列的绑定. 填写队列的名称即可. 如下图完成了三个队列的绑定.
  要达成的目的就是, 往firstexchange交换器中,发送消息,就会往队列中进行发送.
发送分裂模式调用的是如下的方法.  源码如下
源码如下  发送的代码如下 只需写交换器的名称,第二个参数为routingkey,无需指定, 写空字符串即可. 第三个参数为发送消息的内容
  @Test
    public void sendExchangeMsg(){
        rabbitTemplate.convertAndSend("firstexchange","","分裂模式发送消息!!!");
    }
分别创建如下的三个消费者类  Customer1 内容如下
@Component
@RabbitListener(queues="firstQueue")
public class Customer1 {

    /**
     * 方法名: getMsg
     * 方法描述: 消费消息,并打印信息
     * 修改日期: 2019/1/27 10:36
      * @param msg
     * @return void
     * @author taohongchao
     * @throws
     */
    @RabbitHandler
    public void getMsg(String msg) {
        System.out.println("firstQueue: "+msg);
    }
}
Customer2 内容如下
@Component
@RabbitListener(queues="itcast")
public class Customer2 {

    /**
     * 方法名: getMsg
     * 方法描述: 消费消息,并打印信息
     * 修改日期: 2019/1/27 10:36
      * @param msg
     * @return void
     * @author taohongchao
     * @throws
     */
    @RabbitHandler
    public void getMsg(String msg) {
        System.out.println("itcast: "+msg);
    }
}
Customer3 内容如下
@Component
@RabbitListener(queues="secondqueue")
public class Customer3 {

    /**
     * 方法名: getMsg
     * 方法描述: 消费消息,并打印信息
     * 修改日期: 2019/1/27 10:36
      * @param msg
     * @return void
     * @author taohongchao
     * @throws
     */
    @RabbitHandler
    public void getMsg(String msg) {
        System.out.println("secondqueue: "+msg);
    }
}
每一个@RabbitListener注解中的queues的值, 分别对应了三个exchange管理的三个队列的queue队列的值.
测试运行RabbitApplication启动项目, 三个消息的接收者在监听消息了.
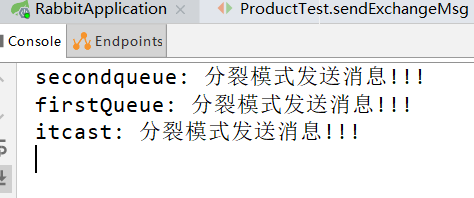
运行测试类中的sendExchangeMsg方法,进行消息的发送, 发送完消息后,控制台打印如下信息, 代表三个队列均接收到了消息.