文章目录
集群包的准备
- 集群包的准备
- 启动第一个节点
- 启动第二个节点
- 启动第三个节点
新建一个elasticsearch-cluster文件夹
把elasticsearch-7.16.2-windows-x86_64.zip文件解压三份, 分别命名为 node1 node2 node3 如下 
对node1的config目录下的elasticsearch.yml进行修改
#集群名称,节点之间要保持一致
cluster.name: my-elasticsearch

# 当前节点名称 是否能 成为master
node.name: node-1001
node.master: true
node.data: true

network.host: localhost

http.port: 1001
# tcp通信端口
transport.tcp.port: 9301

#跨域配置
#action.destructive_requires_name: true
http.cors.enabled: true
http.cors.allow-origin: "*"
修改完成上面的配置后, 即可启动第一个节点. 从启动日志中, 可以看到集群的名称  使用get请求, 可以查看集群的状态
 http://localhost:1001/_cluster/health 响应结果如下
{
    "cluster_name": "my-elasticsearch",
    "status": "yellow",
    "timed_out": false,
    "number_of_nodes": 1,
    "number_of_data_nodes": 1,
    "active_primary_shards": 6,
    "active_shards": 6,
    "relocating_shards": 0,
    "initializing_shards": 0,
    "unassigned_shards": 3,
    "delayed_unassigned_shards": 0,
    "number_of_pending_tasks": 0,
    "number_of_in_flight_fetch": 0,
    "task_max_waiting_in_queue_millis": 0,
    "active_shards_percent_as_number": 66.66666666666666
}
修改第二个节点的配置, 与第一个节点要增加配置. 增加了主节点的配置信息 并且修改相关端口. 集群名称不变.
#集群名称,节点之间要保持一致
cluster.name: my-elasticsearch

# 当前节点名称 是否能 成为master
node.name: node-1002
node.master: true
node.data: true

network.host: localhost

http.port: 1002
# tcp通信端口
transport.tcp.port: 9302

# 主节点的信息
discovery.seed_hosts: ["localhost:9301"]
discovery.zen.fd.ping_timeout: 1m
discovery.zen.fd.ping_retries: 5

#跨域配置
#action.destructive_requires_name: true
http.cors.enabled: true
http.cors.allow-origin: "*"
修改完上面配置后, 进行启动, 从如下启动日志可以看出 , 集群名称为my-elasticsearch, 并且master节点为node1.  再次查询集群状态, 可以看到有两个节点了.
修改第三个解压包的配置文件如下. 在discovery.seed_hosts中, 修改为可以查找9301 和9302 即可以去查找node1 node2 两个节点信息.
#集群名称,节点之间要保持一致
cluster.name: my-elasticsearch

# 当前节点名称 是否能 成为master
node.name: node-1003
node.master: true
node.data: true

network.host: localhost

http.port: 1003
# tcp通信端口
transport.tcp.port: 9303

# 主节点的信息
discovery.seed_hosts: ["localhost:9301","localhost:9302"]
discovery.zen.fd.ping_timeout: 1m
discovery.zen.fd.ping_retries: 5

#跨域配置
#action.destructive_requires_name: true
http.cors.enabled: true
http.cors.allow-origin: "*"
修改完成后, 即可启动.
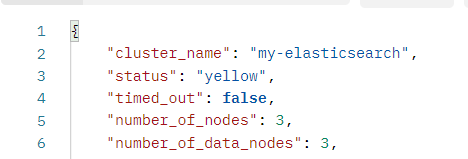
启动完成后, 查看集群信息. 执行请求 http://localhost:1001/_cluster/health 可以看到节点数为三个了.