
 这篇文章以GitLab 12.10.5为示例环境,介绍一下Webhook的使用方式以及常见问题。
使用上有很多示例,这里略举一二示例如下:
GitLab + Jenkins集成用户提交并推送代码至GitLab时,说明代码已经更新,期待和此GitLab关联的Jenkins能够开始持续集成和构建以及部署等流水线的执行,这时就可以使用GitLab的Webhook进行设定。
GitLab + 代码规范评审用户提交并推送代码至GitLab时,期待展开代码提交的comment规范确认、代码安全评审等流程,而此部分功能已经被集成至内部研发系统中,此系统提供相应的Restful API的调用,通过GitLab的Webhook进行关联,实现用户每次提交推送都可以触发相应的代码自动化安全评审。
GitLab的Webhook在GitLab的工程项目中,使用Webhook可以使得使用者在推送代码或创建Issue的时候可以触发一个事前配置好的URL,而推送代码还是创建Issue,抑或是合并请求,使用者可以自行在GitLab中进行定制,GitLab会向设定的Webhook的URL发送一个POST请求。整体来说,Webhook指的是用户定义的HTTP回调,GitLab的Webhook在使用上通常具有如下特性:
- 由某些事件所触发,比如提交代码或者推送代码
- 一般会触发用户定义的URL,事件触发后,由GitLab发送HTTP请求
- Webhook可以从外部更新或者部署
- 在GitLab CE版本中可以对每个项目进行设定,在EE版本中可以对每个项目或者每个组Group进行设定
- 设定方式:项目的 Settings ➔ Webhooks
具体可参看:https://liumiaocn.blog.csdn.net/article/details/107950120
事前准备:显示服务为了显示Webhook的提示信息,使用如下ruby代码进行准备
[root@host131 webhook]# cat print_http_body.rb
require 'webrick'

server = WEBrick::HTTPServer.new(:Port => ARGV.first)
server.mount_proc '/' do |req, res|
  puts req.body
end

trap 'INT' do
  server.shutdown
end
server.start
[root@host131 webhook]#
- 前提:需要安装ruby,如果是在centos或者rhel上,可直接使用yum install ruby来完成
[root@host131 webhook]# ruby -v
ruby 2.0.0p648 (2015-12-16) [x86_64-linux]
[root@host131 webhook]#
- 启动服务
[root@host131 webhook]# ruby print_http_body.rb 8899
[2020-08-18 22:39:19] INFO  WEBrick 1.3.1
[2020-08-18 22:39:19] INFO  ruby 2.0.0 (2015-12-16) [x86_64-linux]
[2020-08-18 22:39:19] WARN  TCPServer Error: Address already in use - bind(2)
[2020-08-18 22:39:19] INFO  WEBrick::HTTPServer#start: pid=14236 port=8899
事前准备:项目准备
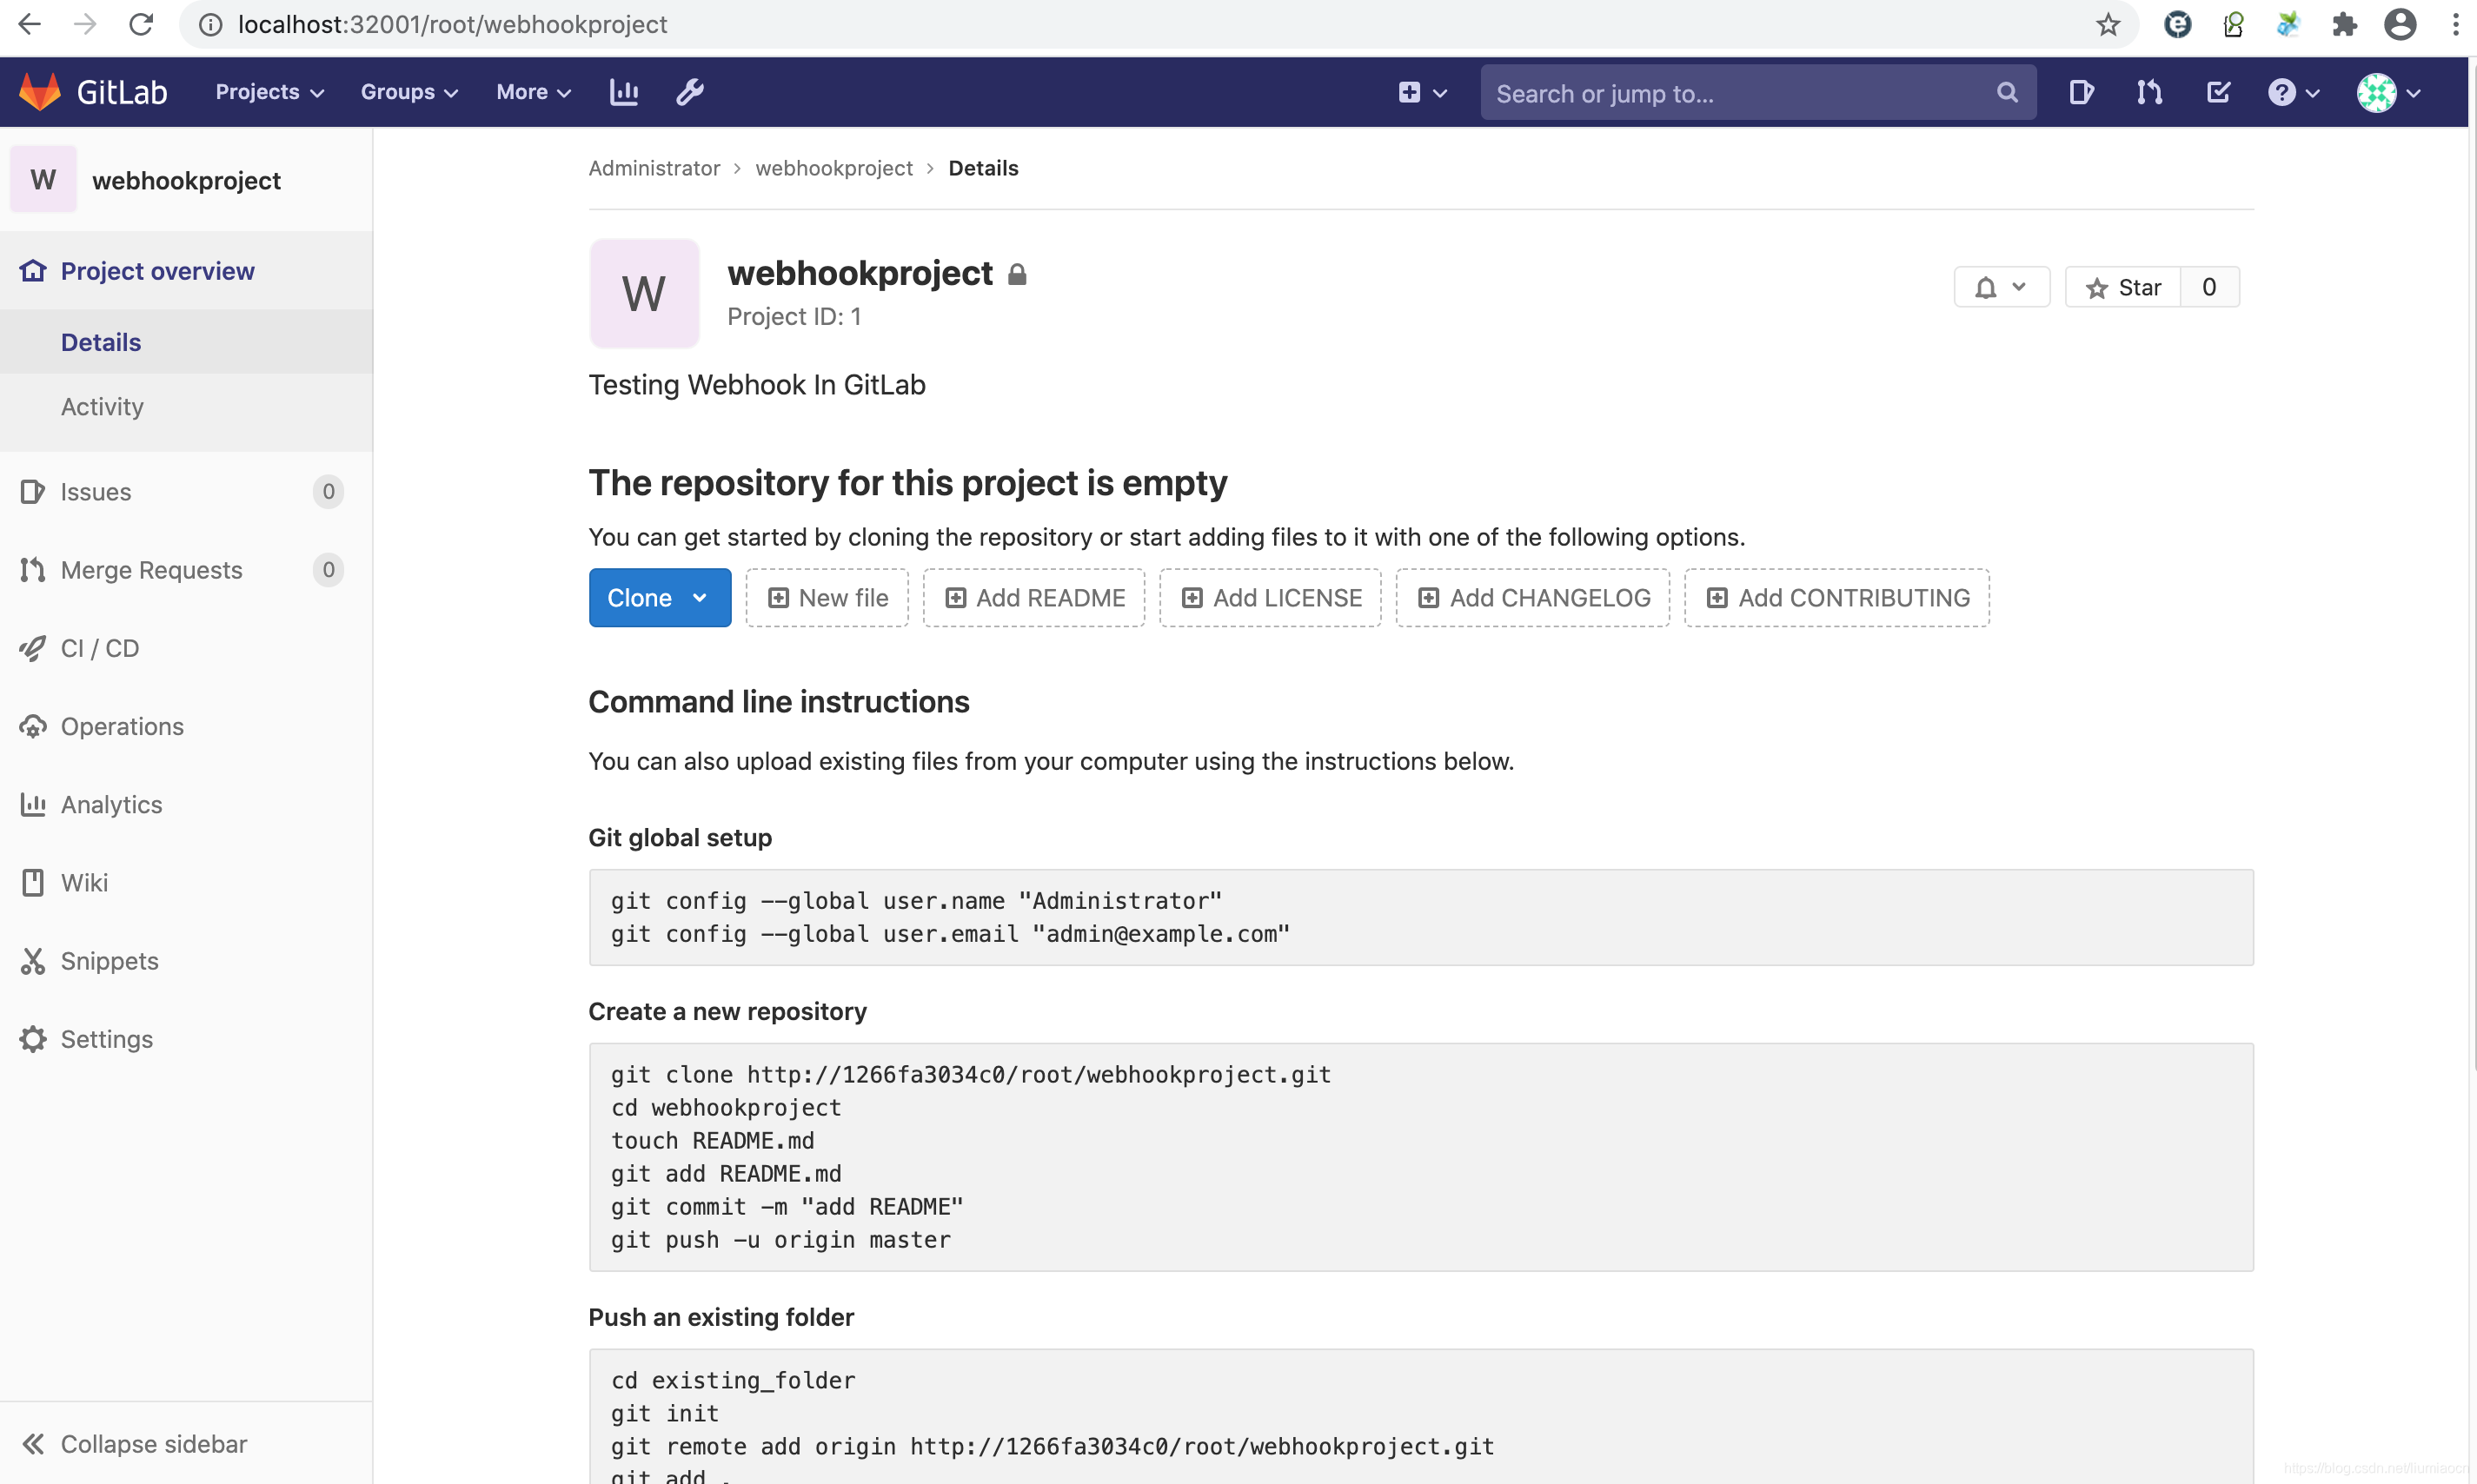
创建一个名为webhookproject的项目或者其他任何项目均可。
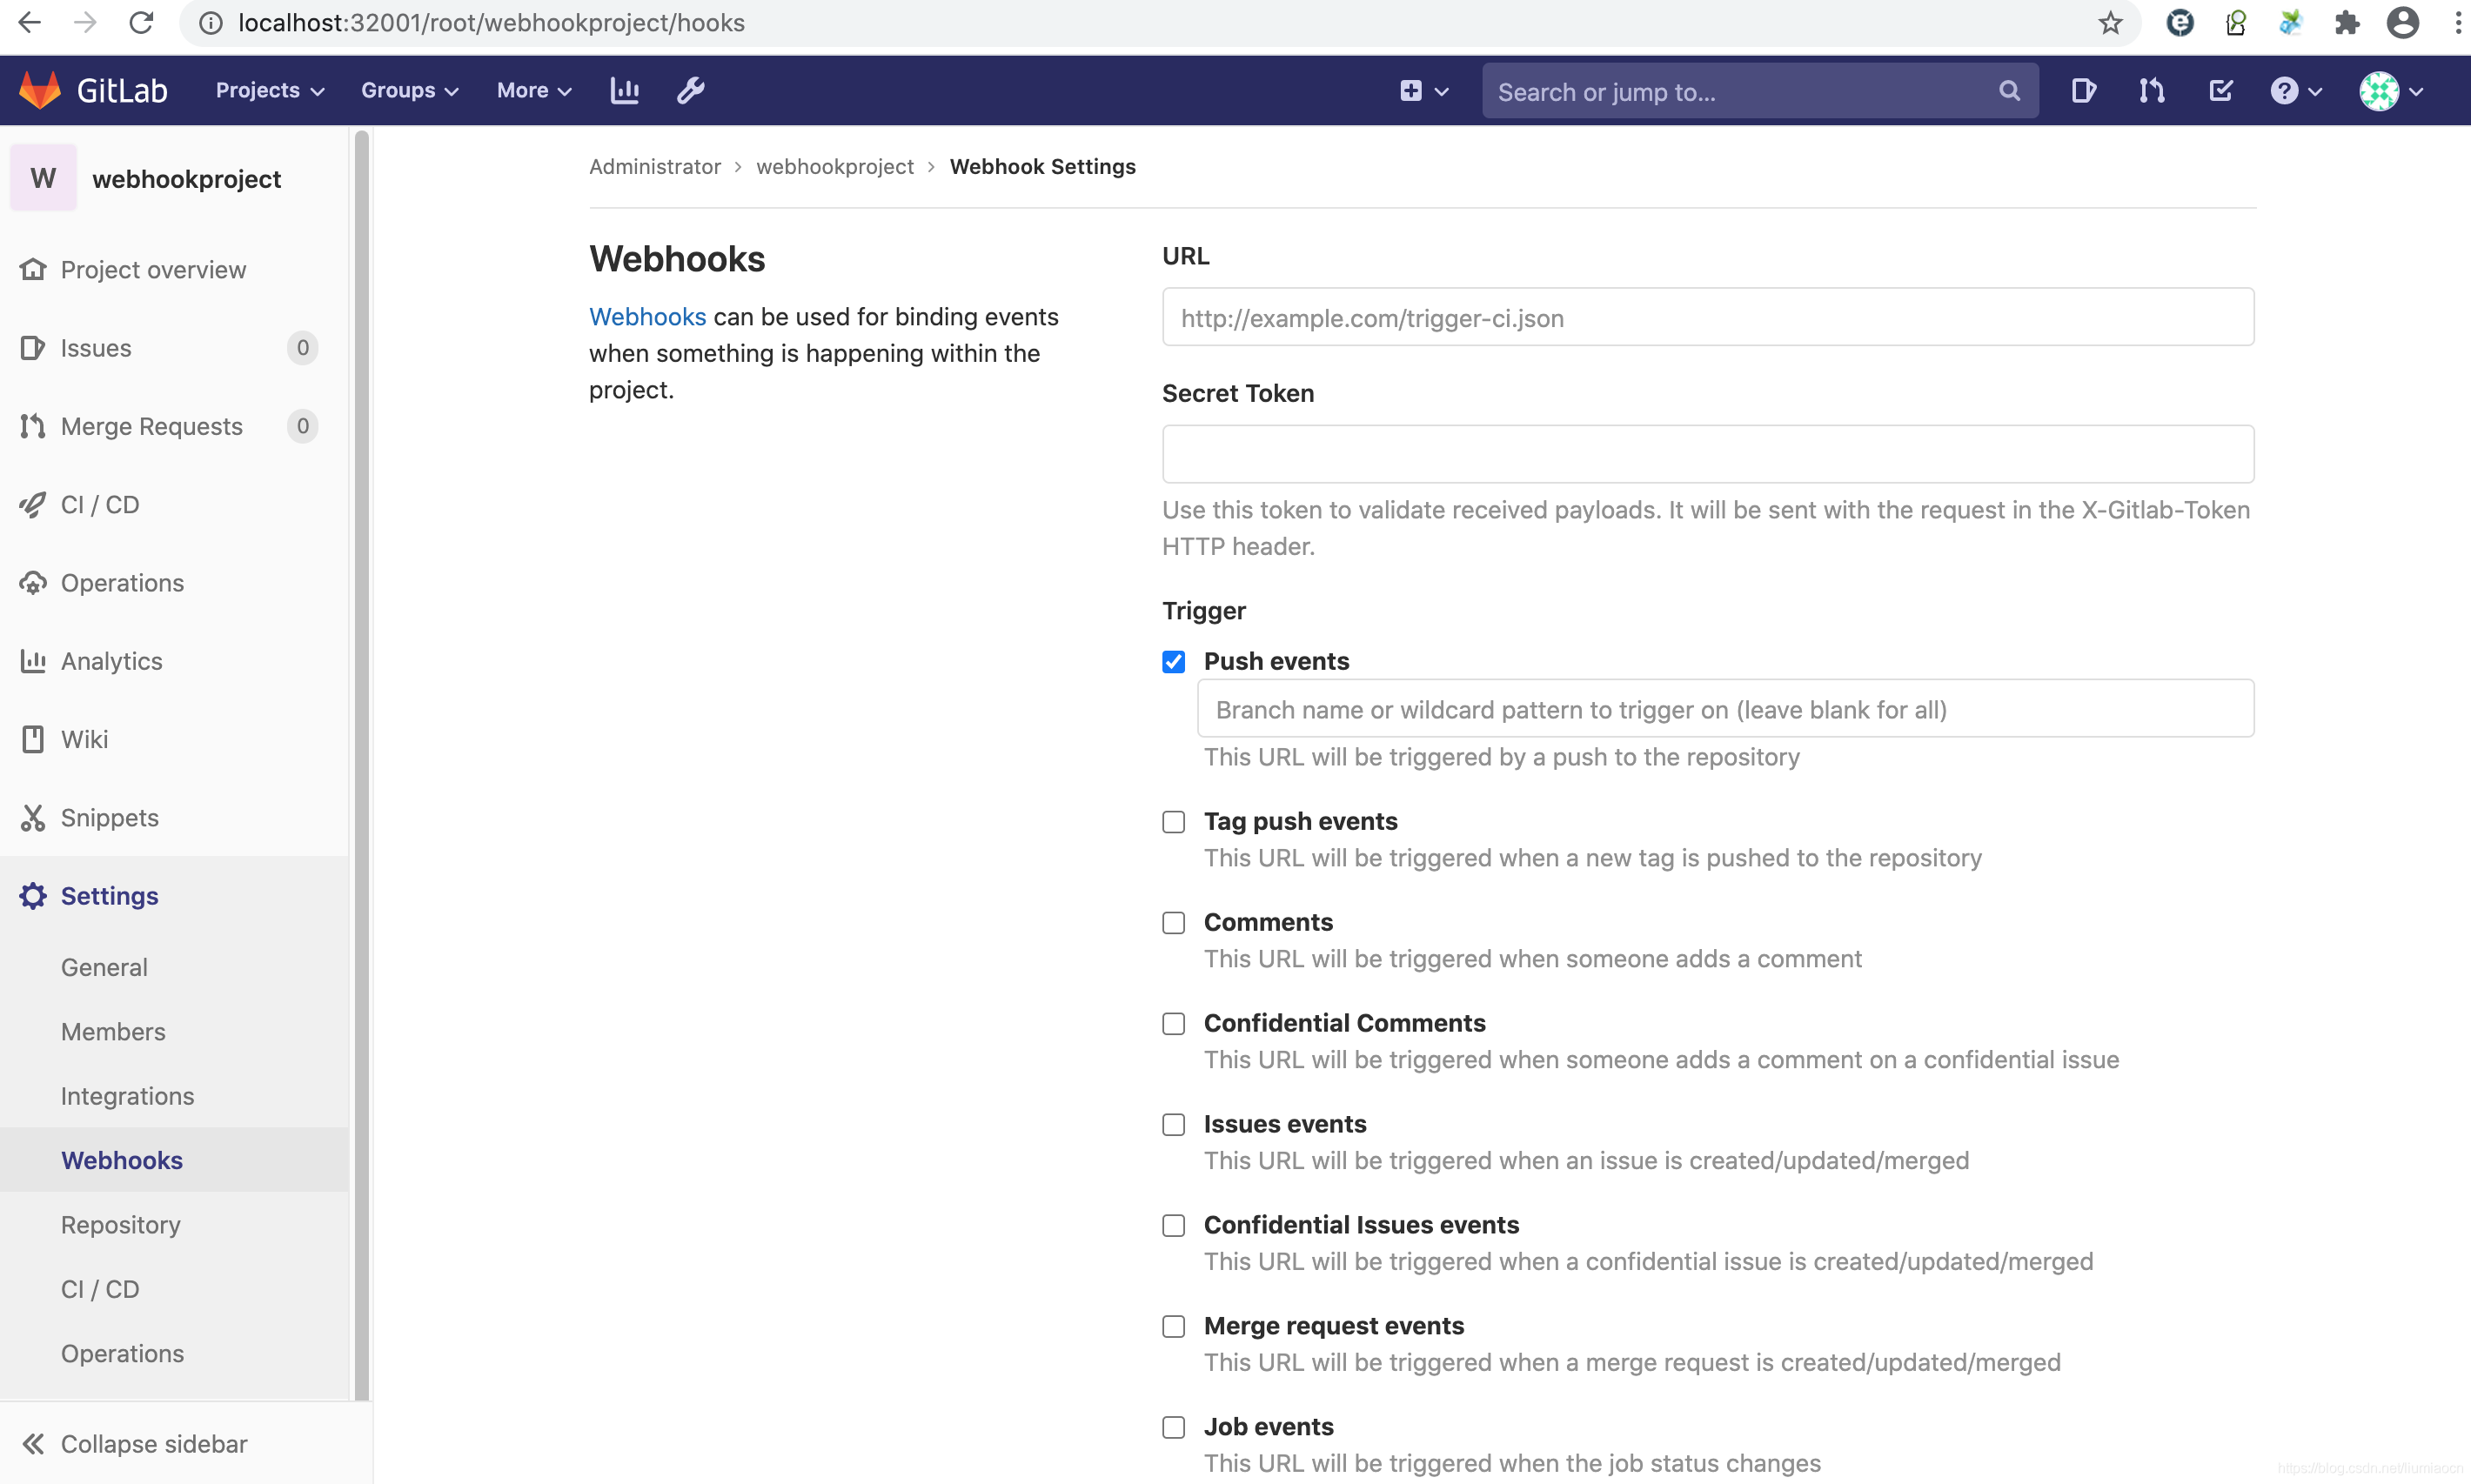
创建Webhook
点击项目的Settings ➔ Webhooks,在如下页面中进行Webhook的设定
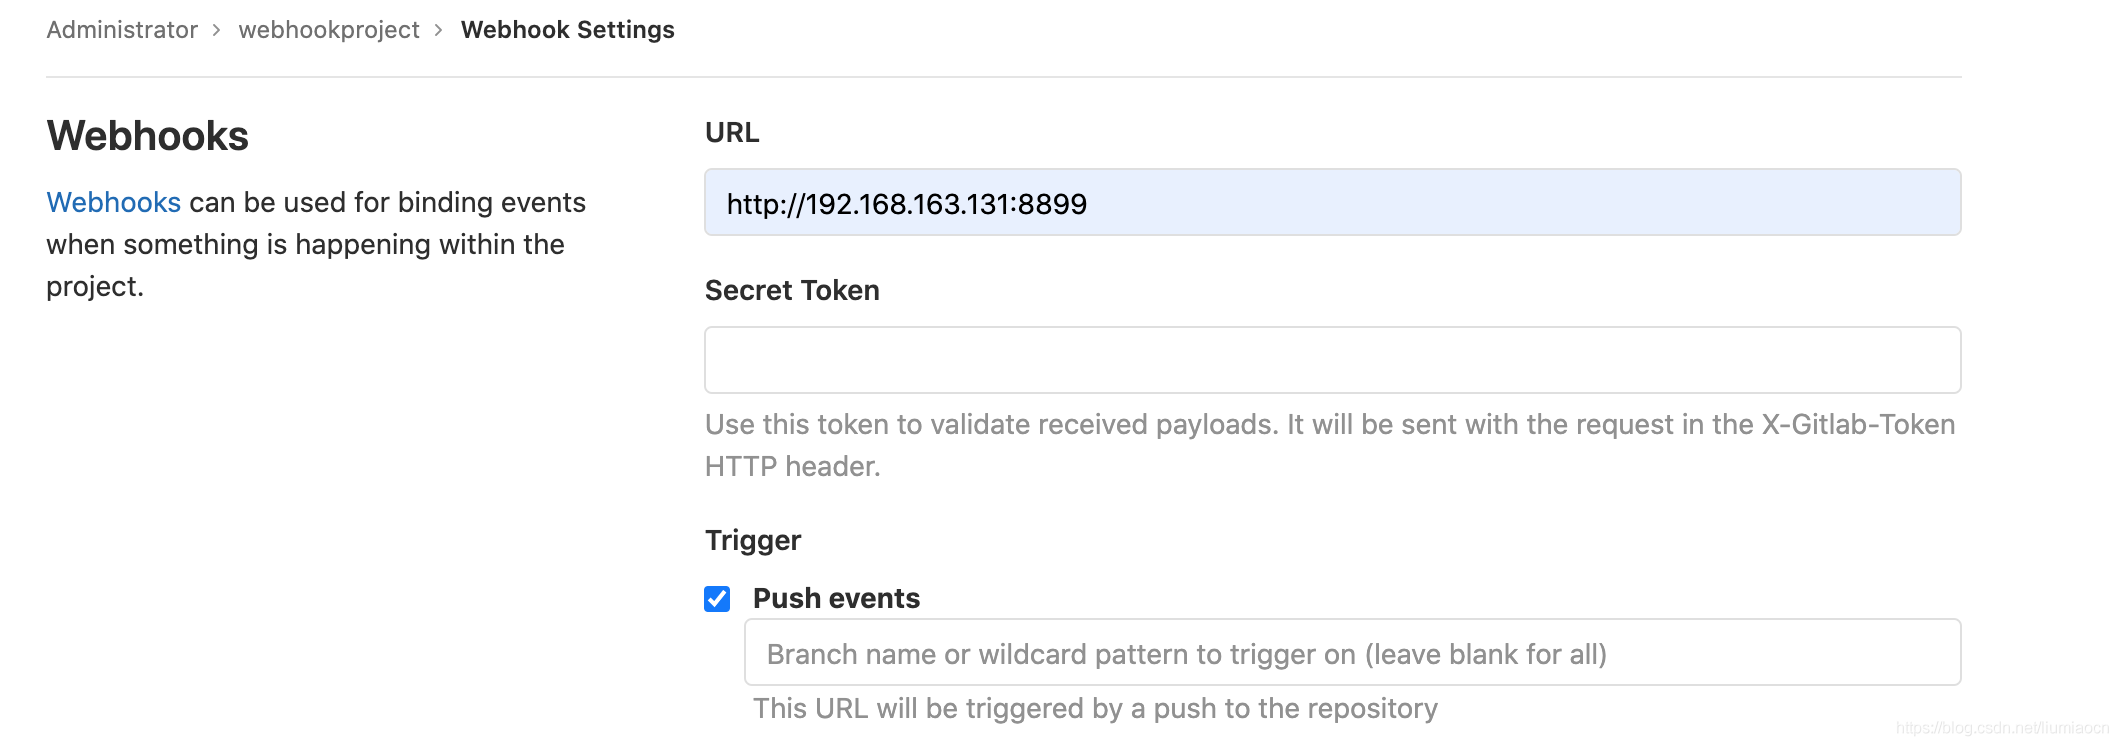
 设定如下事前准备的Webhook链接
使用Webhook所提供的Test按钮,进行结果的正确性验证
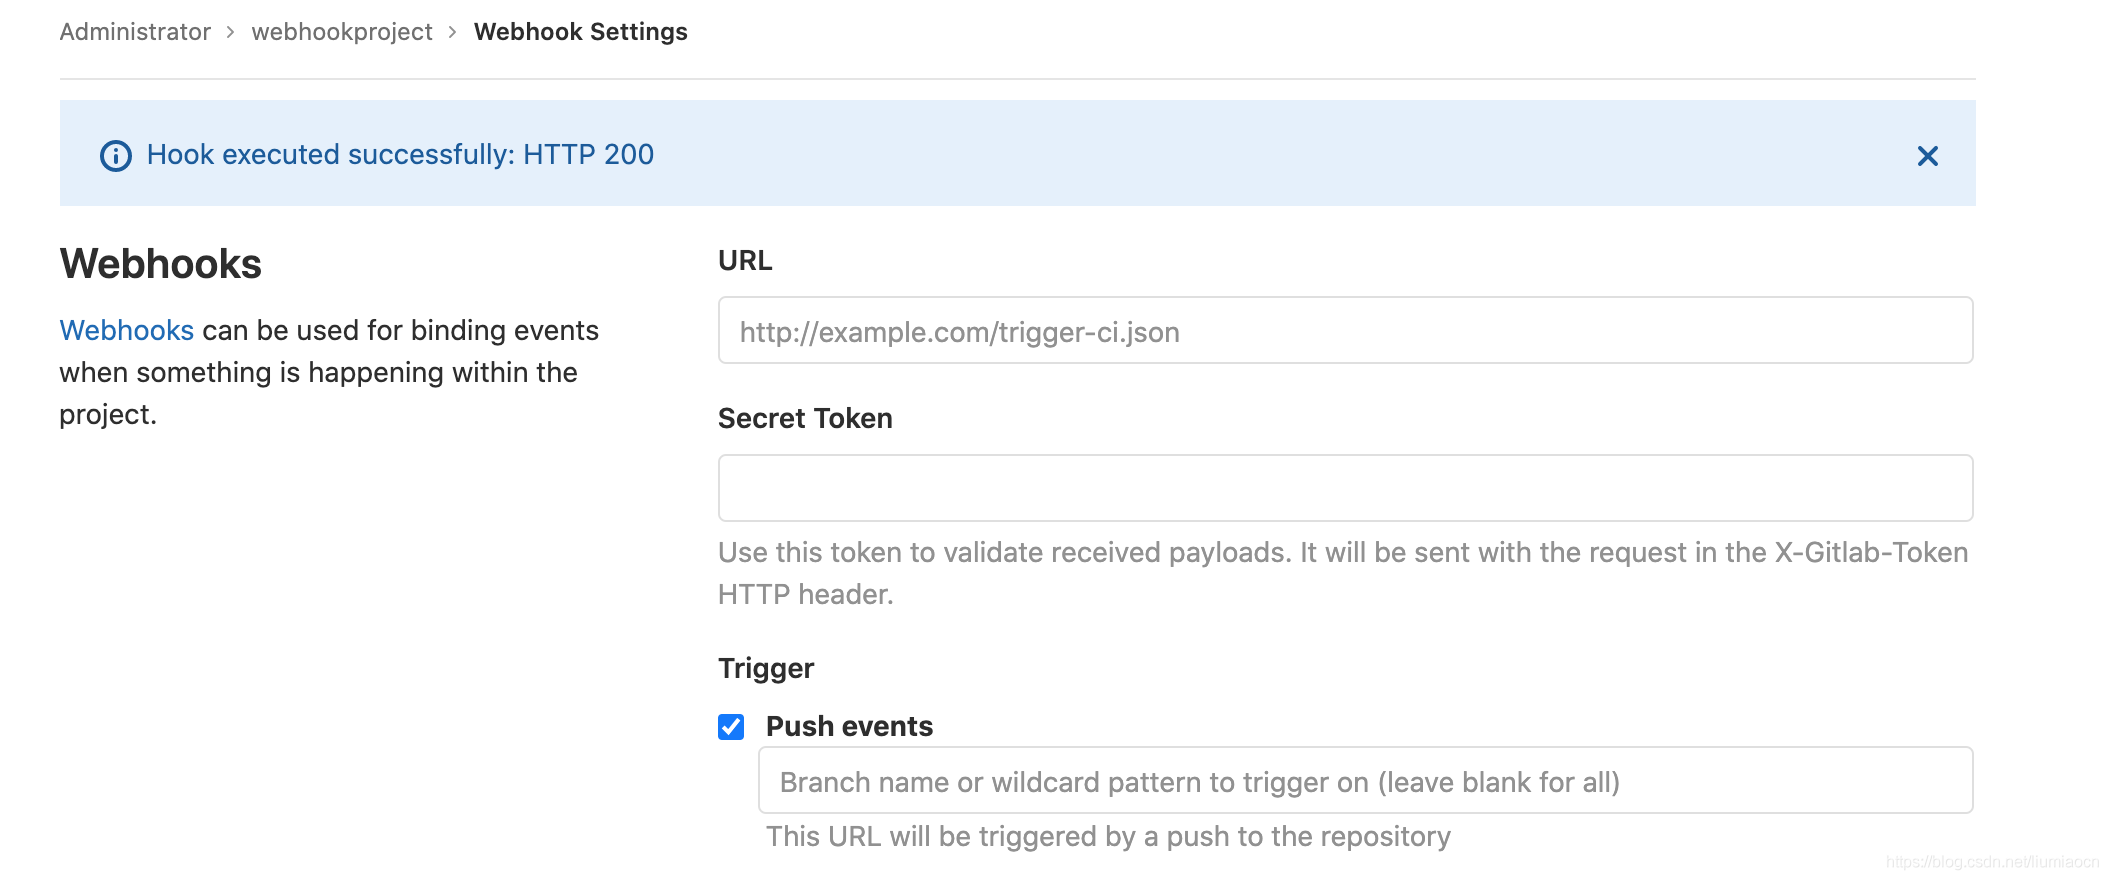
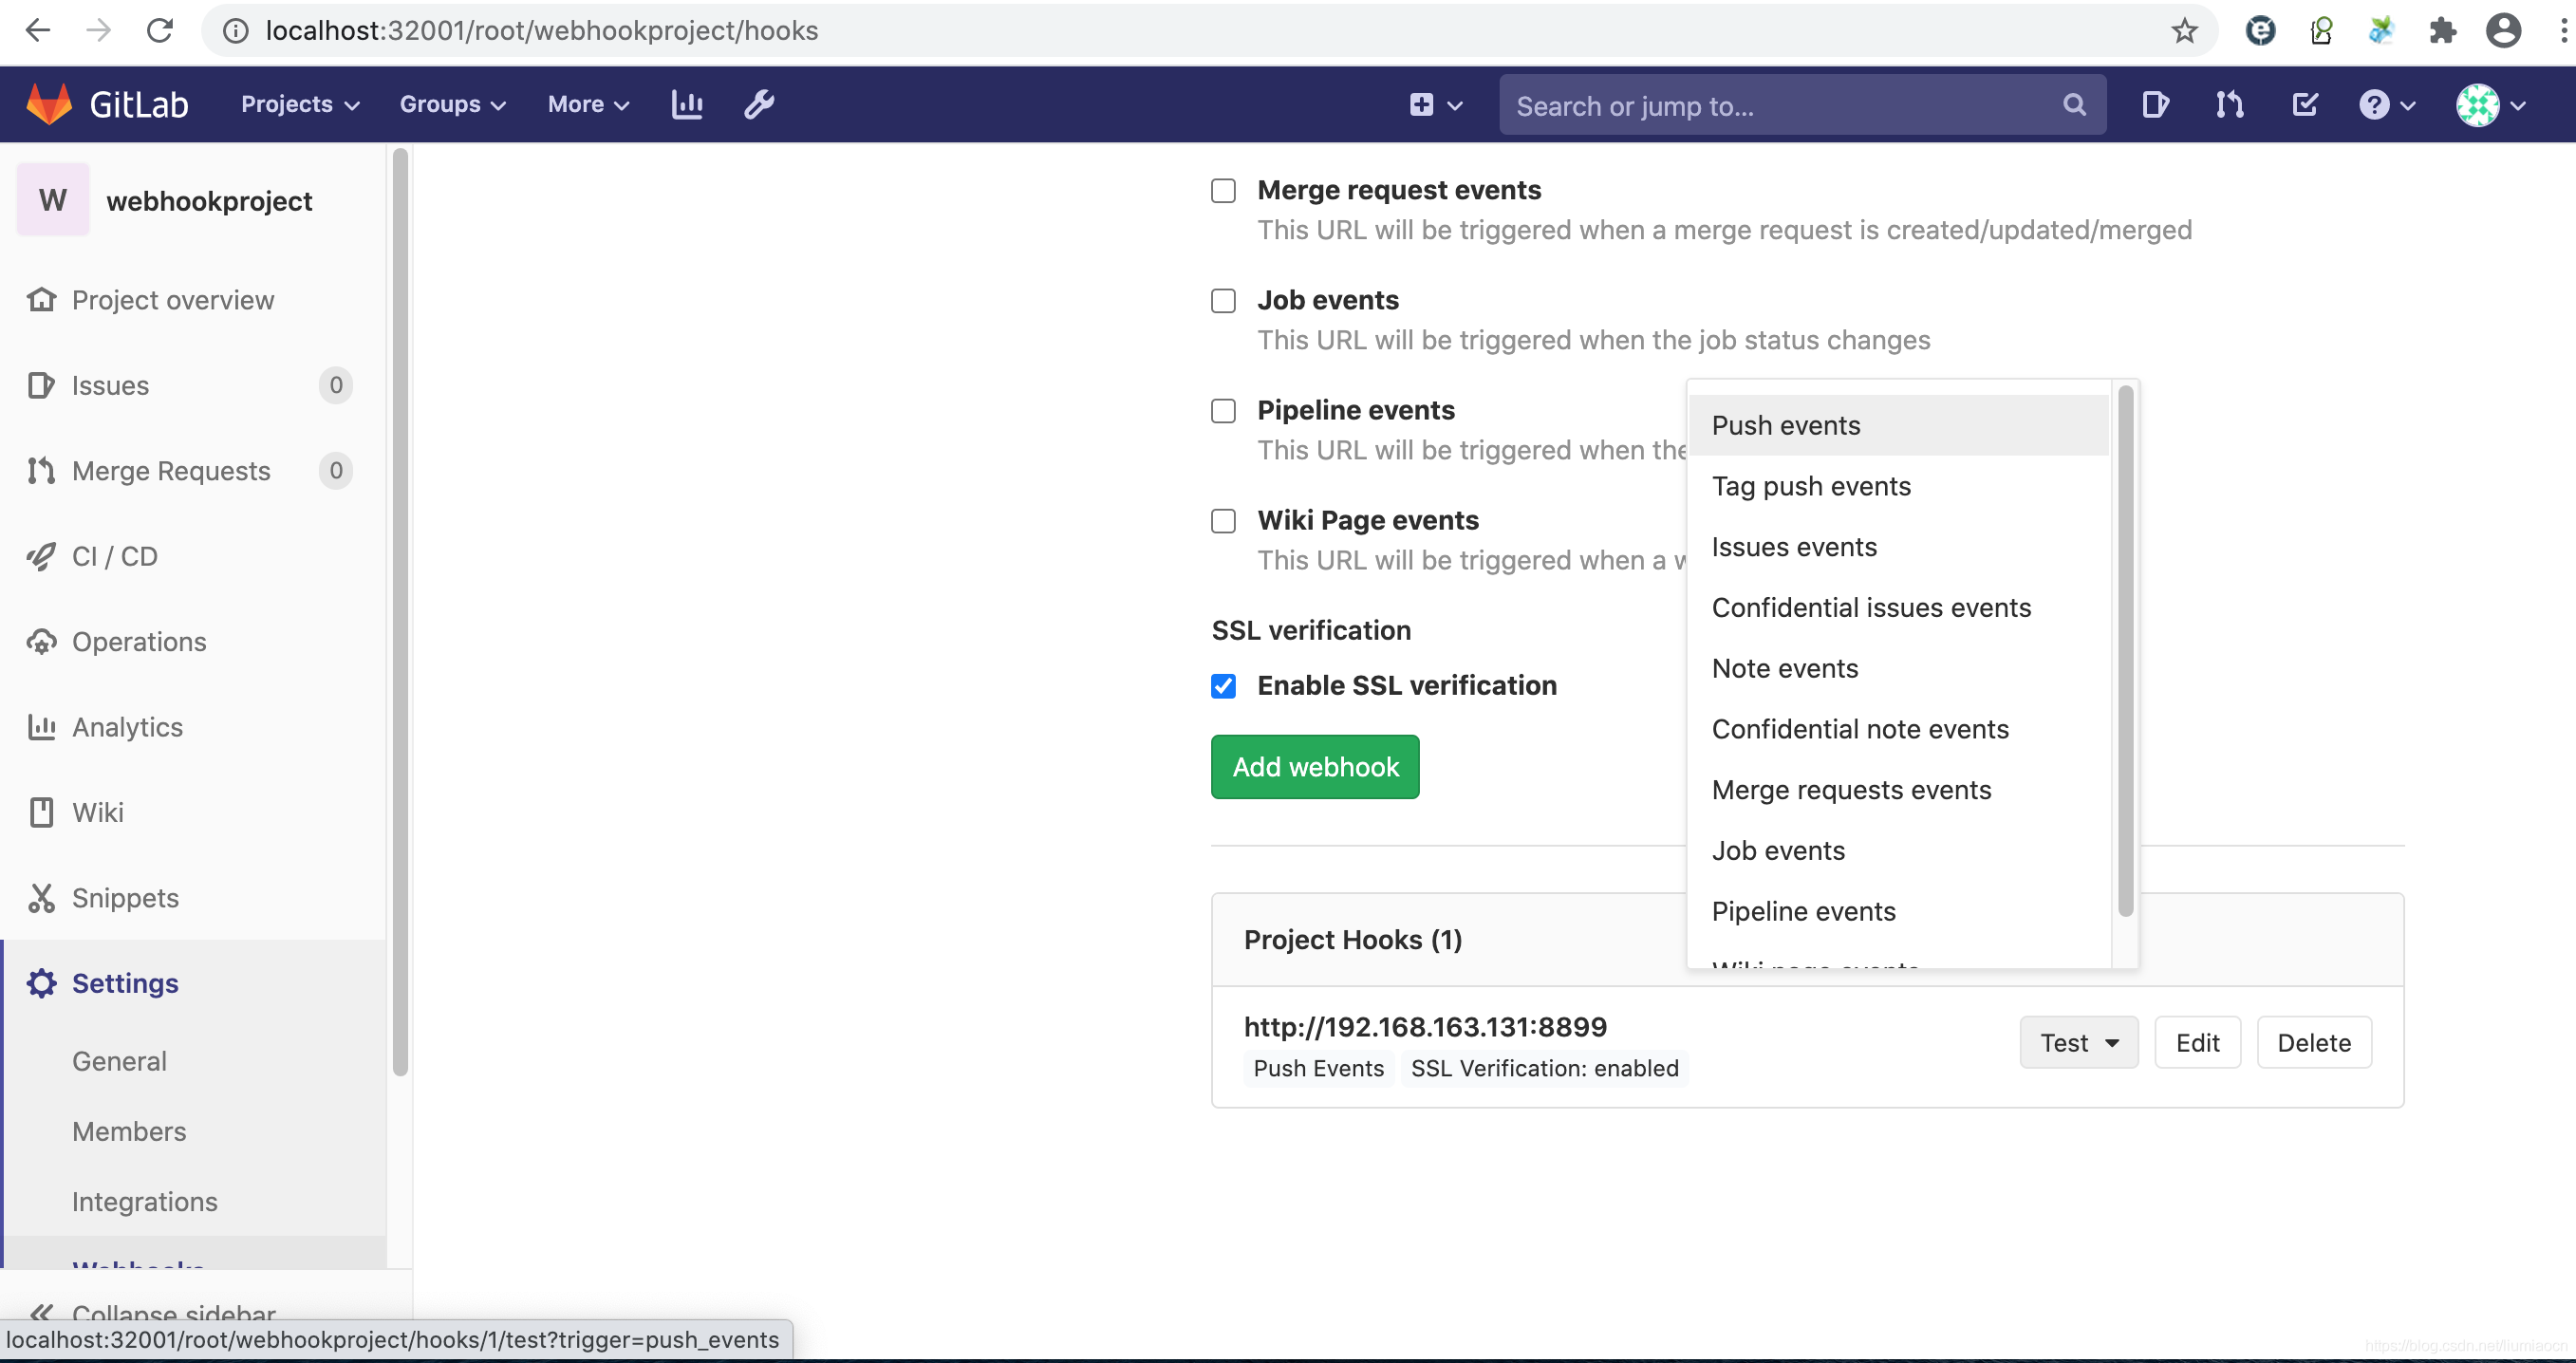 验证之后结果信息如下所示
 同时在事先准备的ruby服务中可以看到如下提示信息
{"object_kind":"push","event_name":"push","before":"cfa33beb824811e41cc372304c00174bbdfd53cd","after":"cfa33beb824811e41cc372304c00174bbdfd53cd","ref":"refs/heads/master","checkout_sha":"cfa33beb824811e41cc372304c00174bbdfd53cd","message":null,"user_id":1,"user_name":"Administrator","user_username":"root","user_email":"","user_avatar":"https://www.gravatar.com/avatar/e64c7d89f26bd1972efa854d13d7dd61?s=80\u0026d=identicon","project_id":1,"project":{"id":1,"name":"webhookproject","description":"Testing Webhook In GitLab","web_url":"http://1266fa3034c0/root/webhookproject","avatar_url":null,"git_ssh_url":"git@1266fa3034c0:root/webhookproject.git","git_http_url":"http://1266fa3034c0/root/webhookproject.git","namespace":"Administrator","visibility_level":0,"path_with_namespace":"root/webhookproject","default_branch":"master","ci_config_path":null,"homepage":"http://1266fa3034c0/root/webhookproject","url":"git@1266fa3034c0:root/webhookproject.git","ssh_url":"git@1266fa3034c0:root/webhookproject.git","http_url":"http://1266fa3034c0/root/webhookproject.git"},"commits":[{"id":"cfa33beb824811e41cc372304c00174bbdfd53cd","message":"Add LICENSE","title":"Add LICENSE","timestamp":"2020-08-19T02:25:12+00:00","url":"http://1266fa3034c0/root/webhookproject/-/commit/cfa33beb824811e41cc372304c00174bbdfd53cd","author":{"name":"Administrator","email":"admin@example.com"},"added":["LICENSE"],"modified":[],"removed":[]}],"total_commits_count":1,"push_options":{},"repository":{"name":"webhookproject","url":"git@1266fa3034c0:root/webhookproject.git","description":"Testing Webhook In GitLab","homepage":"http://1266fa3034c0/root/webhookproject","git_http_url":"http://1266fa3034c0/root/webhookproject.git","git_ssh_url":"git@1266fa3034c0:root/webhookproject.git","visibility_level":0}}
172.18.0.2 - - [18/Aug/2020:22:42:36 EDT] "POST / HTTP/1.1" 200 0
- -> /
常见问题
内部URL不可用
- 现象如下
Url is blocked: Requests to the local network are not allowed
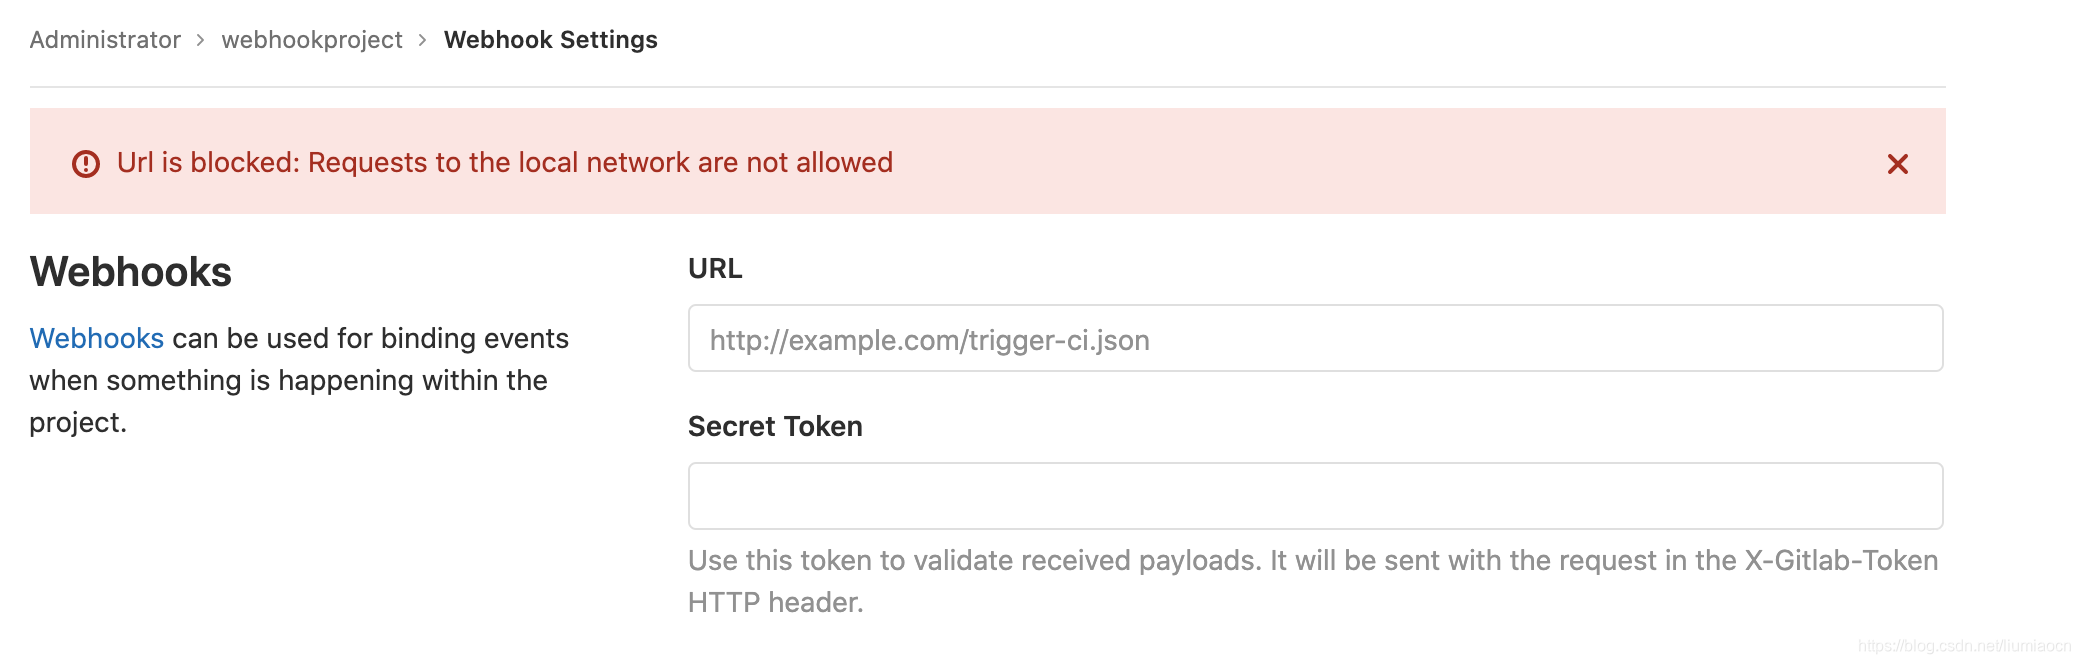
- 对应方法 https://blog.csdn.net/liumiaocn/article/details/82429425
- 现象如下
Hook execution failed: Ensure the project has at least one commit.
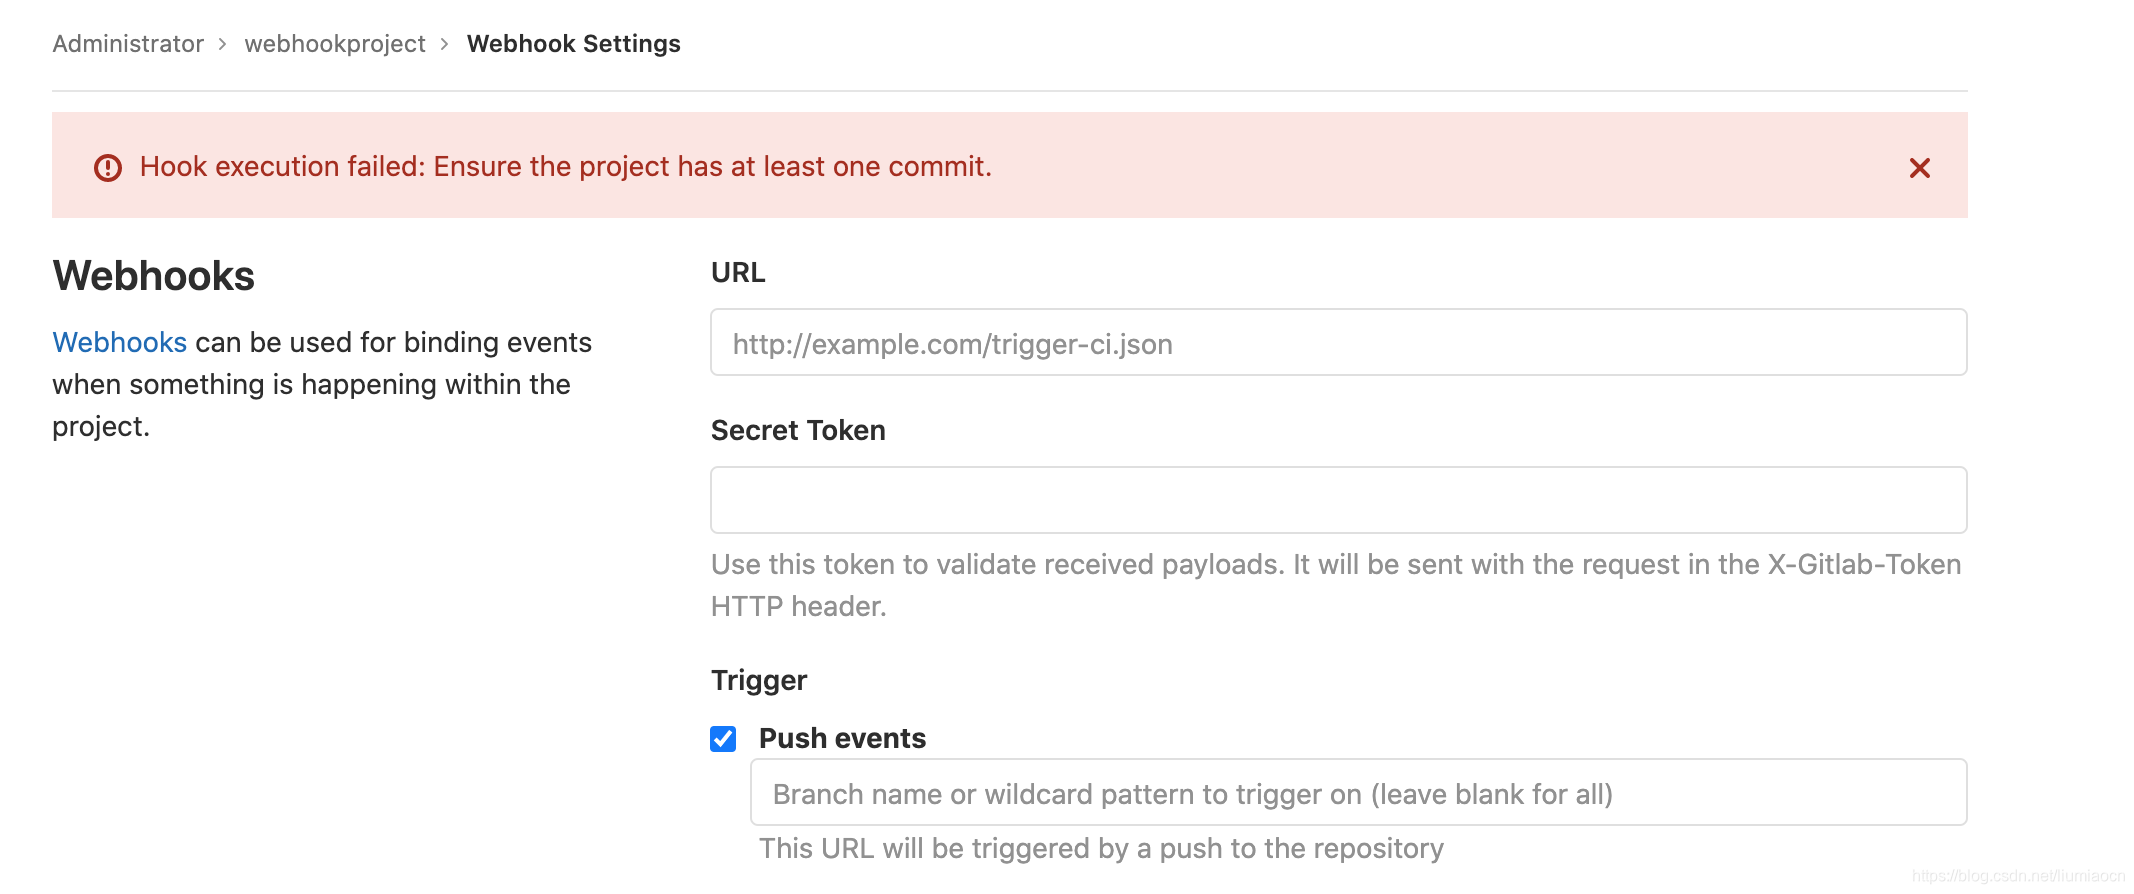
-
原因
项目此时刚刚创建,内容为空
-
对应方法
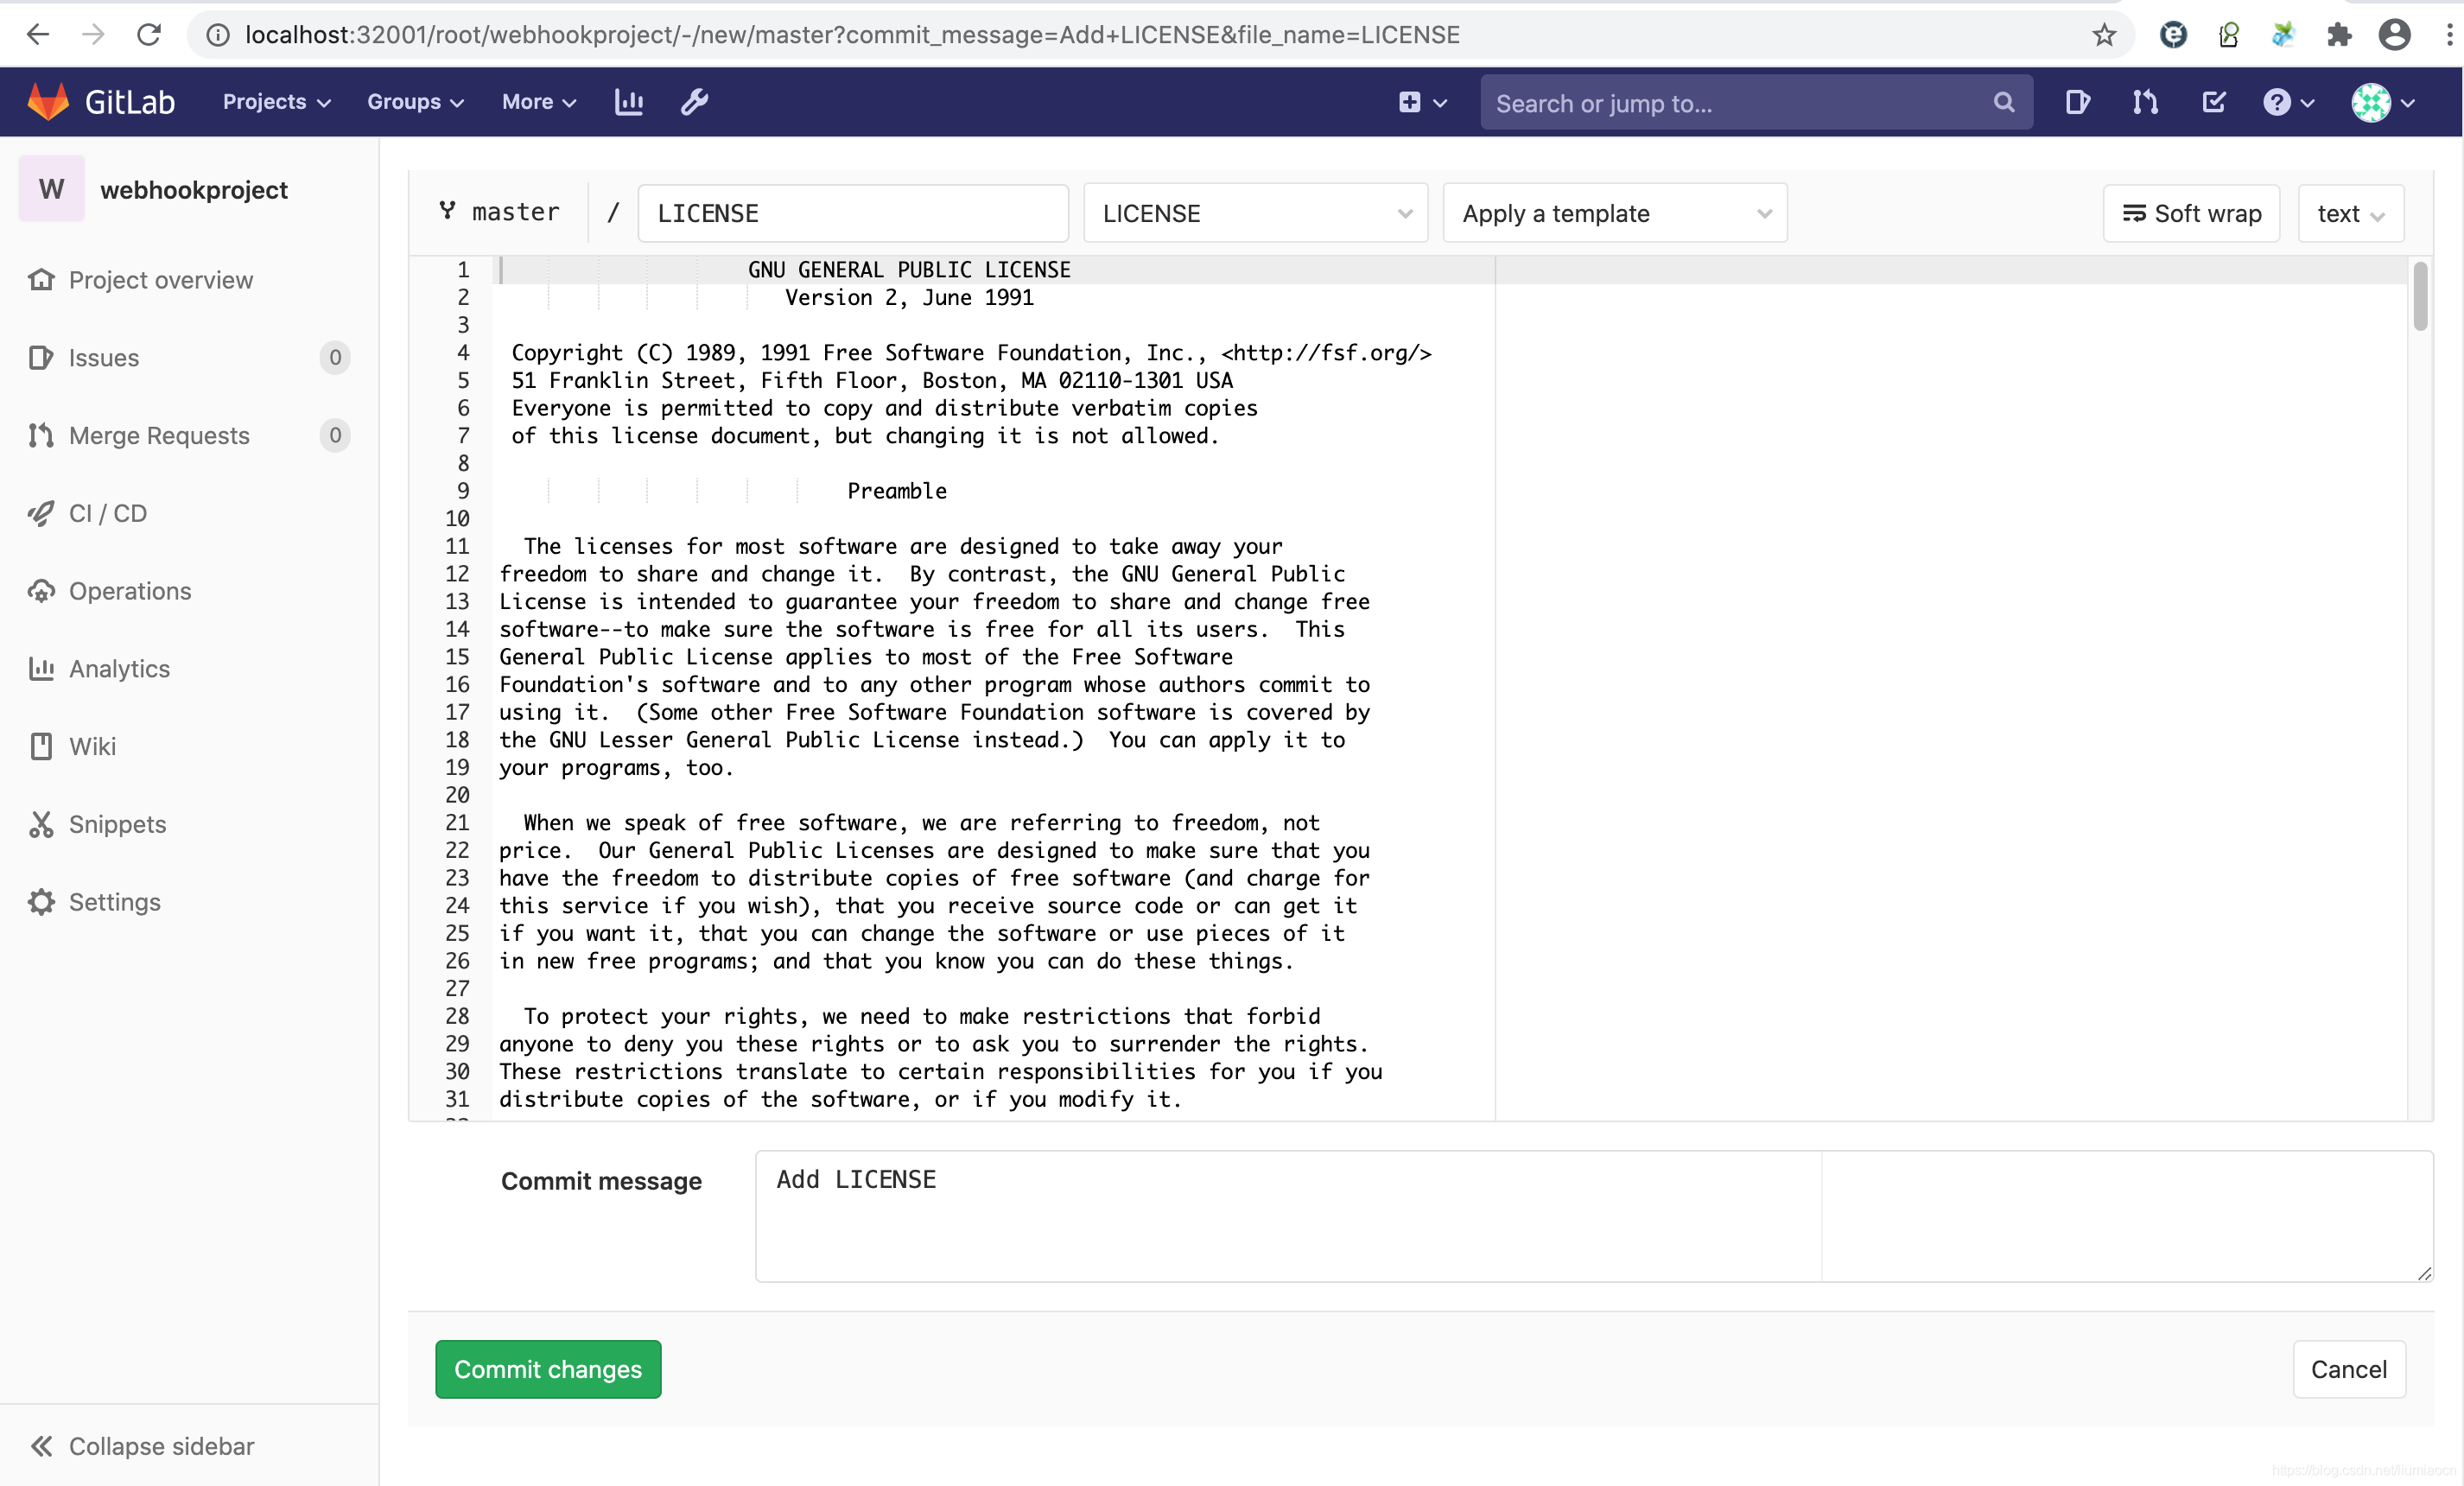
初始化完成即可,比如这里我们添加一个Apache License 2.0协议的LICENSE文件
- 现象如下
Hook execution failed: Failed to open TCP connection to 192.168.163.131:8899 (No route to host - connect(2) for "192.168.163.131" port 8899)
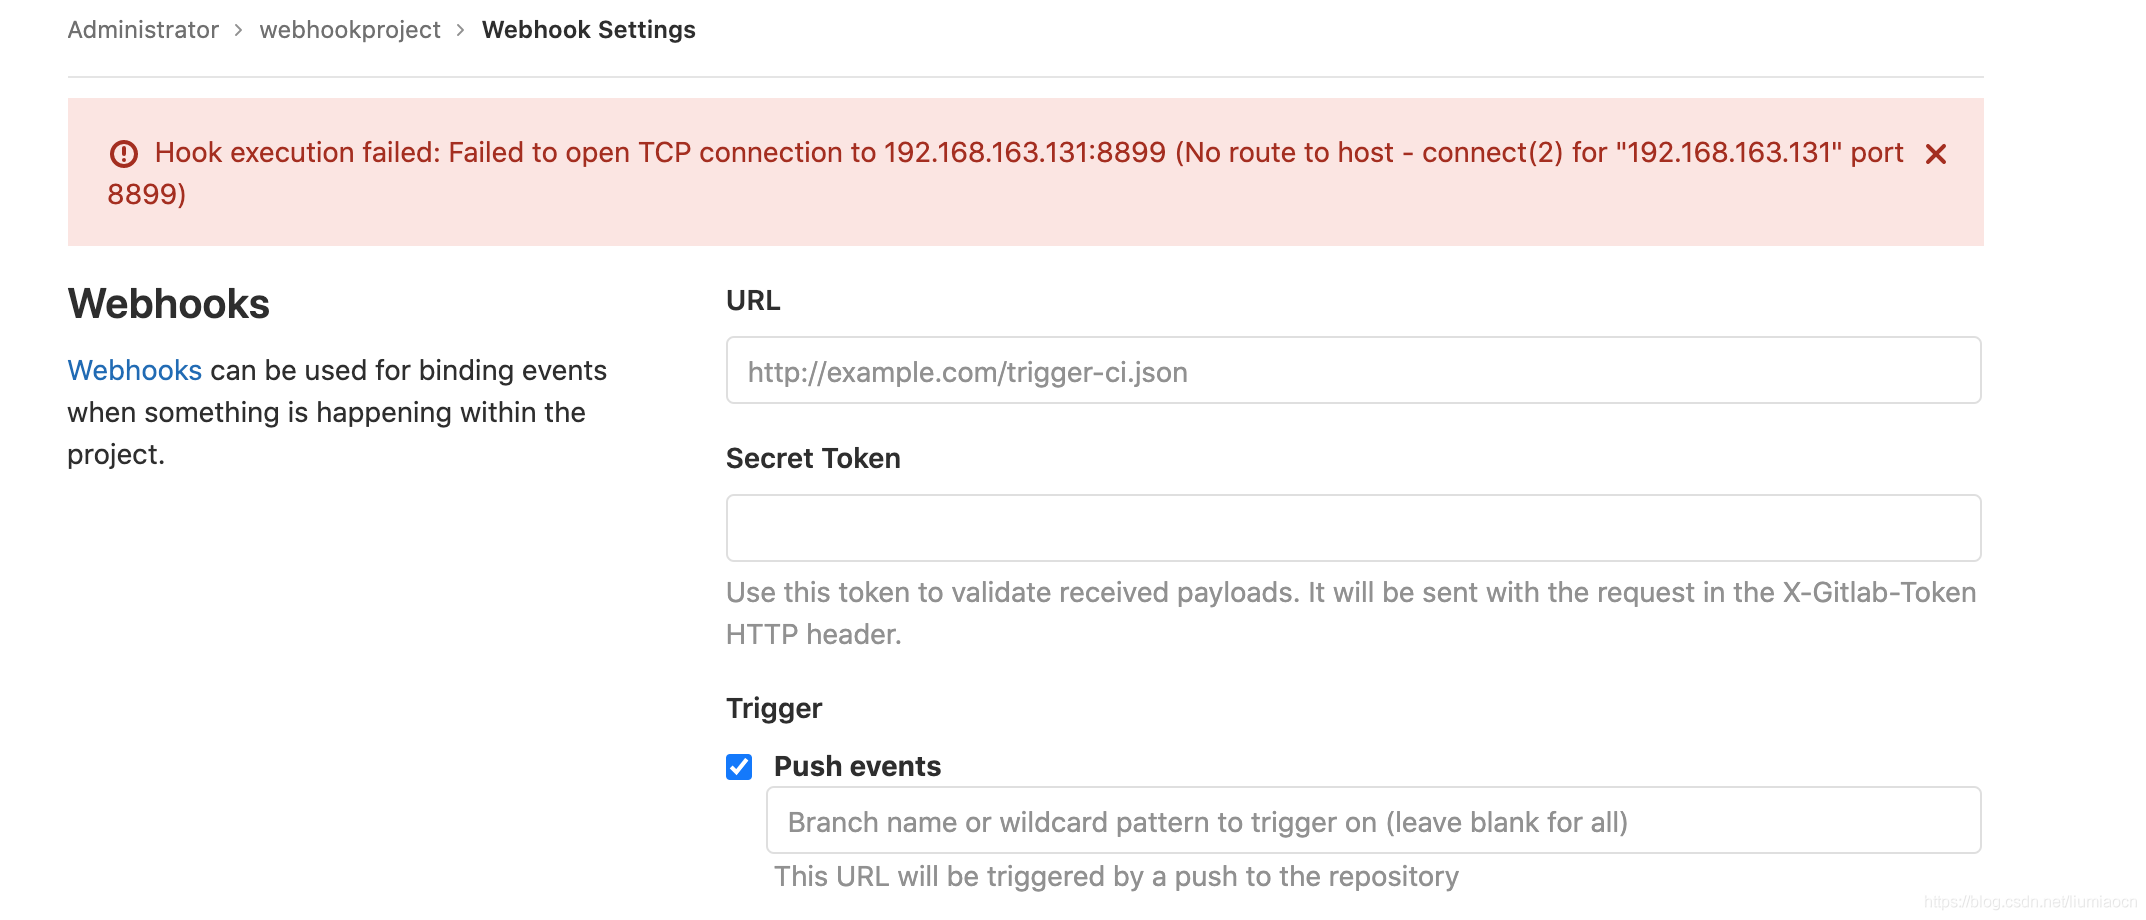
- 原因 此项问题纯粹因为设定问题,比如此处为本机的firewalld的规则未设定相应的端口开通,可以事先通过curl命令确认是否OK,比如出现上述问题,在GitLab的容器之内,curl命令也同样报错
# curl http://192.168.163.131:8899
curl: (7) Failed to connect to 192.168.163.131 port 8899: No route to host
#
使用对应方法中提示的方式设定之后,curl方式如通的话,本文示例中,即可在ruby的外部应用中看到GET相关的访问记录了
172.18.0.2 - - [18/Aug/2020:22:41:30 EDT] "GET / HTTP/1.1" 200 0
- -> /
- 对应方法 设定相应的firewalld的服务,设定端口的规则或者关闭firewalld均可
https://docs.gitlab.com/ee/raketasks/web_hooks.html https://docs.gitlab.com/ee/user/project/integrations/webhooks.html

