以下链接是个人关于FSA-Net(头部姿态估算) 所有见解,如有错误欢迎大家指出,我会第一时间纠正。有兴趣的朋友可以加微信:17575010159 相互讨论技术。若是帮助到了你什么,一定要记得点赞!因为这是对我最大的鼓励。 文末附带 \color{blue}{文末附带} 文末附带 公众号 − \color{blue}{公众号 -} 公众号− 海量资源。 \color{blue}{ 海量资源}。 海量资源。
姿态估计1-00:FSA-Net(头部姿态估算)-目录-史上最新无死角讲解
数据制作-报错解决通过前面的博客,我们已经知道如何去训练,以及测试网络了,但是存在很多疑问,就是对于网络的输入和输出,我相信大家都是比较模糊。那么这个小结,我们就来深究一下数据的预处理过程。还是一样的套路,回到工程的README.md文件,可以看到如下: 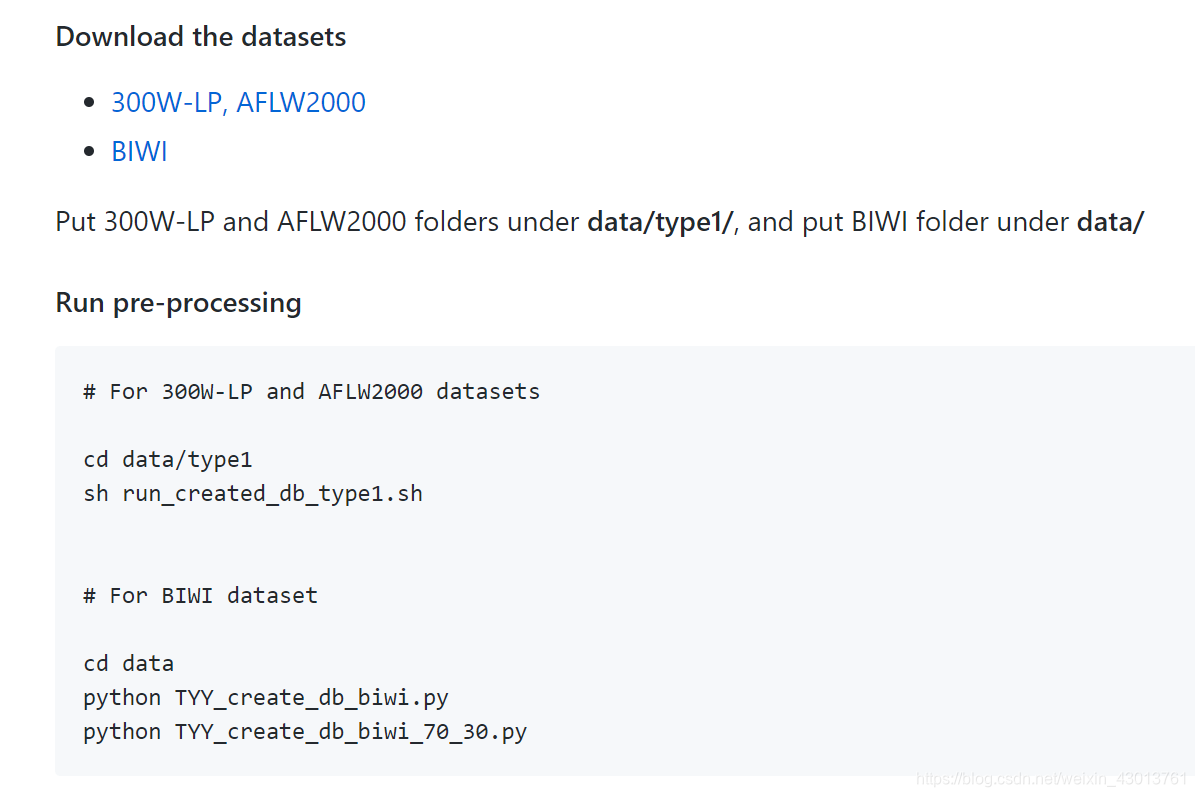 乖乖听话奥,按照他的提示,下载好300W-LP, AFLW2000以及BIWI,下载好之后呢,我们还要先做一件事情,之前训练和测试的过程中,我们不是使用自己制作的数据,而是直接替换了data文件夹,那么现在我们也要返回之前的步骤,也就是把data文件夹复原(从源码拷贝一份出来即可),本人data目录显示如下:
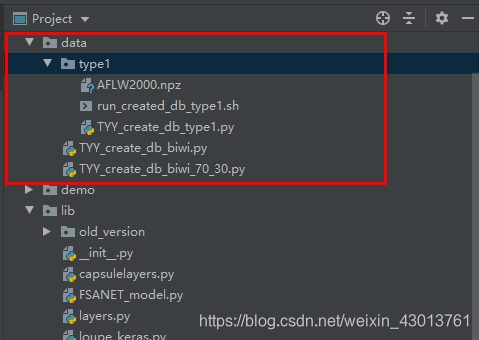 好了,准备好之后,我们按照提示,放入300W-LP,300W-LP, AFLW2000以及BIWI,本人放置之后显示如下:
放置完成之后,根据提示,需要执行sh run_created_db_type1.sh,这是一个脚本,我们查看内容如下:
python TYY_create_db_type1.py --db './300W_LP/AFW' --output './AFW.npz' --img_size 64 --ad 0.6
python TYY_create_db_type1.py --db './300W_LP/AFW_Flip' --output './AFW_Flip.npz' --img_size 64 --ad 0.6
python TYY_create_db_type1.py --db './300W_LP/HELEN' --output './HELEN.npz' --img_size 64 --ad 0.6
python TYY_create_db_type1.py --db './300W_LP/HELEN_Flip' --output './HELEN_Flip.npz' --img_size 64 --ad 0.6
python TYY_create_db_type1.py --db './300W_LP/IBUG' --output './IBUG.npz' --img_size 64 --ad 0.6
python TYY_create_db_type1.py --db './300W_LP/IBUG_Flip' --output './IBUG_Flip.npz' --img_size 64 --ad 0.6
python TYY_create_db_type1.py --db './300W_LP/LFPW' --output './LFPW.npz' --img_size 64 --ad 0.6
python TYY_create_db_type1.py --db './300W_LP/LFPW_Flip' --output './LFPW_Flip.npz' --img_size 64 --ad 0.6

python TYY_create_db_type1.py --db './AFLW2000' --output './AFLW2000.npz' --img_size 64 --ad 0.6
那么我们把这些代码一句一句执行即可,如本人在终端首先执行,示例如下:
python TYY_create_db_type1.py --db './300W_LP/AFW' --output './AFW.npz' --img_size 64 --ad 0.6
报错1如下:
Traceback (most recent call last):
  File "TYY_create_db_type1.py", line 8, in
    from moviepy.editor import *
ModuleNotFoundError: No module named 'moviepy'
安装该模块即可,本人执行如下:
pip install moviepy -i https://pypi.tuna.tsinghua.edu.cn/simple/ --trusted-host pypi.douban.com --default-timeout=100
然后再次执行命令。
报错2如下:
Traceback (most recent call last):
  File "TYY_create_db_type1.py", line 121, in
    main()
  File "TYY_create_db_type1.py", line 40, in main
    onlyfiles_mat = [f for f in listdir(mypath) if isfile(join(mypath, f)) and join(mypath, f).endswith('.mat')]
FileNotFoundError: [WinError 3] 系统找不到指定的路径。: "'./300W_LP/AFW'"
我们修改执行的命令如下:
# python TYY_create_db_type1.py --db './300W_LP/AFW' --output './AFW.npz' --img_size 64 --ad 0.6
python TYY_create_db_type1.py --db  ./300W_LP/AFW --output  ./AFW.npz  --img_size 64 --ad 0.6
下面的为修改之后的,认真的朋友看了就能发现,就是把’'符号去除掉了,为什么这么做,我就不解释了哈,这样的傻逼问题遇到的次数比较多,就习惯了。本人成功运行之后打印如下: 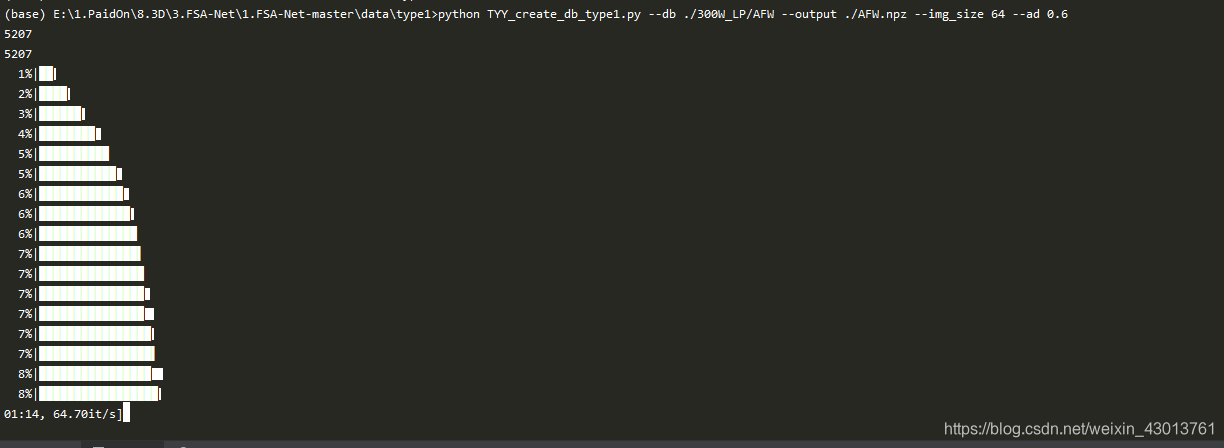 剩下就就是照葫芦画瓢了,我们需要把data/type1/run_created_db_type1.sh中的指令都执行一遍。大家或许比较好奇,为什么我总喜欢要pycharm,其实主要是为了后续分析代码,使用debug模式。
等到把data/type1/run_created_db_type1.sh执行完成之后,我们还要执行:
python TYY_create_db_biwi.py
python TYY_create_db_biwi_70_30.py
在执行其的时候,我先要把下载后解压的BIWI得到的hpdb文件夹改名为BIWI,然后放置在如下路径: 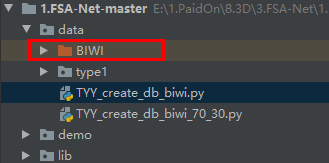 等我们全部执行完成时候,显示如下,本人data目录显示如下:
 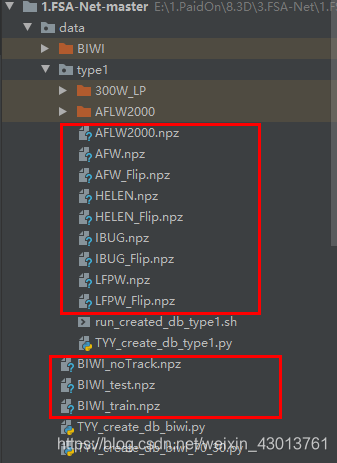 这样,就和我们之前替换的data目录基本一致了。
在这里呢,我为大家稍微讲解一下data/type1/TYY_create_db_type1.py代码,对于data/TYY_create_db_biwi_70_30.py代码,我就不进行讲解了,因为都是差不多的流程,TYY_create_db_type1.py注释如下(后面还有带读):
import scipy.io as sio
import pandas as pd
from os import listdir
from os.path import isfile, join
from tqdm import tqdm
import sys
import cv2
from moviepy.editor import *
import numpy as np
import argparse


def get_args():
	parser = argparse.ArgumentParser(description="This script cleans-up noisy labels "
	                                             "and creates database for training.",
	                                 formatter_class=argparse.ArgumentDefaultsHelpFormatter)
	parser.add_argument("--db", type=str, default='./AFW',
	                    help="path to database")
	parser.add_argument("--output", type=str, default='./AFW.npz',
	                    help="path to output database mat file")
	parser.add_argument("--img_size", type=int, default=64,
	                    help="output image size")
	parser.add_argument("--ad", type=float, default=0.6,
	                    help="enlarge margin")


	args = parser.parse_args()
	return args


def main():
	args = get_args()
	mypath = args.db
	output_path = args.output
	img_size = args.img_size
	ad = args.ad

	isPlot = True

	# 获取mypath路径下所有的.mat文件名称
	onlyfiles_mat = [f for f in listdir(mypath) if isfile(join(mypath, f)) and join(mypath, f).endswith('.mat')]
	# 获取mypath路径下所有的.jpg文件名称
	onlyfiles_jpg = [f for f in listdir(mypath) if isfile(join(mypath, f)) and join(mypath, f).endswith('.jpg')]

	# 进行排序
	onlyfiles_mat.sort()
	onlyfiles_jpg.sort()

	# 打印长度
	print(len(onlyfiles_jpg))
	print(len(onlyfiles_mat))

	# 保存所有图像像素
	out_imgs = []
	# 保存所有图像对应的姿态
	out_poses = []

	for i in tqdm(range(len(onlyfiles_jpg))):
		# 获得图片路径
		img_name = onlyfiles_jpg[i]
		# 获得图片对应的mat文件路径
		mat_name = onlyfiles_mat[i]

		img_name_split = img_name.split('.')
		mat_name_split = mat_name.split('.')

		# 如果图像路径和mat文件不对应则退出报错
		if img_name_split[0] != mat_name_split[0]:
			print('Mismatched!')
			sys.exit()

		# 加载mat文件中的内容
		mat_contents = sio.loadmat(mypath + '/' + mat_name)
		#
		pose_para = mat_contents['Pose_Para'][0]


		# 获得人脸的68个关键点坐标
		pt2d = mat_contents['pt2d']
		pt2d_x = pt2d[0,:]
		pt2d_y = pt2d[1,:]

		# I found negative value in AFLW2000. It need to be removed.
		pt2d_idx = pt2d_x>0.0
		pt2d_idy= pt2d_y>0.0

		pt2d_id = pt2d_idx
		if sum(pt2d_idx) > sum(pt2d_idy):
			pt2d_id = pt2d_idy

		# 68个关键点的x,y坐标(坐标如果小于0,则已经被剔除)
		pt2d_x = pt2d_x[pt2d_id]
		pt2d_y = pt2d_y[pt2d_id]

		# 对于图片路径的像素,以及高宽
		img = cv2.imread(mypath+'/'+img_name)
		img_h = img.shape[0]
		img_w = img.shape[1]

		# 可以取消注释,查看68个关键点
		# point_size = 1
		# point_color = (0, 0, 255)  # BGR
		# thickness = 4  # 可以为 0 、4、8
		# poins = zip(pt2d_x, pt2d_y)
		# for x,y in poins:
		# 	cv2.circle(img, (int(x),int(y)), point_size, point_color, thickness)
		# cv2.imshow('check', img)
		# k = cv2.waitKey(500)

		# 根据关键点,对图片进行剪裁
		# Crop the face loosely
		x_min = int(min(pt2d_x))
		x_max = int(max(pt2d_x))
		y_min = int(min(pt2d_y))
		y_max = int(max(pt2d_y))

		h = y_max-y_min
		w = x_max-x_min

		# ad = 0.4,这个的ad*w表示,根据关键点剪切的时候,其增加剪切边缘的大小
		x_min = max(int(x_min - ad * w), 0)
		x_max = min(int(x_max + ad * w), img_w - 1)
		y_min = max(int(y_min - ad * h), 0)
		y_max = min(int(y_max + ad * h), img_h - 1)

		img = img[y_min:y_max,x_min:x_max]

		# Checking the cropped image,可以设置为ture查看剪切之后的效果
		if isPlot:
			cv2.imshow('check',img)
			k=cv2.waitKey(500)
			pass

		img = cv2.resize(img, (img_size, img_size))

		# 获得对应三维空间的旋转角度
		pitch = pose_para[0] * 180 / np.pi
		yaw = pose_para[1] * 180 / np.pi
		roll = pose_para[2] * 180 / np.pi

		# 把旋转角度当做标签,加入数组
		cont_labels = np.array([yaw, pitch, roll])

		out_imgs.append(img)
		out_poses.append(cont_labels)
	# 保存文件
	np.savez(output_path,image=np.array(out_imgs), pose=np.array(out_poses), img_size=img_size)


if __name__ == '__main__':
	main()
其过程还是挺简单的,我相信,大家主要的好奇点还是在于mat文件的存储格式,或者说其中都包含了图片对应的那些信息。在源码读取mat文件的时候,可以看到其中主要存在以下几个字典:
'pt2d' [2,68]
'roi'  [1,4]
'Illum_Para' [1,10]
'Color_Para' [1,7]
'Tex_Para' [199,1]
'Shape_Para' [199,1]
'Exp_Para' [29,1]
'Pose_Para' [1,7]
懵逼吧,不知道是什么吧,哈哈,当初看到的时候,我也不知道是什么,琢磨这’pt2d’ 是关键点,‘Pose_Para’ 是姿态方位,但是为什么其有7个呢?不急,下面我为大家解释一下。
分别表示pitch、yaw、roll、tdx、tdy、tdz、scale_factor,
tdx、tdy和tdz应该是平移矩阵的数据,scale_factor表示相机变换的尺度系数。至于其他的,嘻嘻,我看不懂。看不懂就看不懂呗,反正也没有用到。还有就是,在源码中,我添加了显示68个关键点的函数,大家可以取消注释查看一下。
这样,数据制作,以及预处理代码已经为大家讲解完成了,下面我们就是要开始真正的分析源码了。先点个赞啊!抱拳!