一、搭建父工程
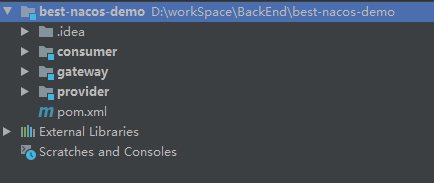
1.1 整体目录结构

    4.0.0

    org.example
    best-nacos-demo
    1.0-SNAPSHOT

        provider
        consumer
        gateway

    pom


                org.springframework.boot
                spring-boot-dependencies
                2.2.2.RELEASE
                pom
                import


                org.springframework.cloud
                spring-cloud-dependencies
                Hoxton.SR1
                pom
                import


                com.alibaba.cloud
                spring-cloud-alibaba-dependencies
                2.1.0.RELEASE
                pom
                import
        best-nacos-demo
        org.example
        1.0-SNAPSHOT

    4.0.0

    provider


            org.springframework.cloud
            spring-cloud-starter-openfeign


            com.alibaba.cloud
            spring-cloud-starter-alibaba-nacos-discovery


            org.springframework.boot
            spring-boot-starter-web
package com.best;

import org.springframework.boot.SpringApplication;
import org.springframework.boot.autoconfigure.SpringBootApplication;
import org.springframework.cloud.client.discovery.EnableDiscoveryClient;
import org.springframework.cloud.openfeign.EnableFeignClients;

@SpringBootApplication
@EnableDiscoveryClient
@EnableFeignClients
public class NacosProviderAplication {
	public static void main(String[] args)
	{
		SpringApplication.run(NacosProviderAplication.class, args);
	}
}
server:
  port: 9083 #启动端口
spring:
  application:
    name: provider
  cloud:
    nacos:
      discovery:
        server-addr: 127.0.0.1:8848
package com.best.nacos.controller;

import org.springframework.beans.factory.annotation.Value;
import org.springframework.web.bind.annotation.GetMapping;
import org.springframework.web.bind.annotation.RequestMapping;
import org.springframework.web.bind.annotation.RestController;

@RestController
@RequestMapping("/provider")
public class ProviderController {

	@Value("${server.port}")
	String port;

	@GetMapping("/service")
	public String service() {

		String result = "provider invoke: " + port;
		System.out.println("**********" + result);
		return result;
	}

}

        best-nacos-demo
        org.example
        1.0-SNAPSHOT

    4.0.0

    consumer


            org.springframework.cloud
            spring-cloud-starter-openfeign


            com.alibaba.cloud
            spring-cloud-starter-alibaba-nacos-discovery


            org.springframework.boot
            spring-boot-starter-web
package com.best.nacos;

import org.springframework.boot.SpringApplication;
import org.springframework.boot.autoconfigure.SpringBootApplication;
import org.springframework.cloud.client.discovery.EnableDiscoveryClient;


@SpringBootApplication
@EnableDiscoveryClient
public class NacosGatewayApplication {
    public static void main(String[] args) {
        SpringApplication.run(NacosGatewayApplication.class, args);
    }
}
server:
  port: 9084 #启动端口
spring:
  application:
    name: consumer
  cloud:
    nacos:
      discovery:
        server-addr: 127.0.0.1:8848
#        namespace: 9dac116e-8bab-4848-98e3-478f09ec0853 # 配置在开发环境
package com.best.nacos.client;

import org.springframework.cloud.openfeign.FeignClient;
import org.springframework.web.bind.annotation.GetMapping;

@FeignClient(value = "provider")
public interface ProviderClient {

	@GetMapping("/provider/service")
	public String service();
}
package com.best.nacos.controller;

import com.best.nacos.client.ProviderClient;
import org.springframework.beans.factory.annotation.Autowired;
import org.springframework.beans.factory.annotation.Value;
import org.springframework.web.bind.annotation.GetMapping;
import org.springframework.web.bind.annotation.RequestMapping;
import org.springframework.web.bind.annotation.RestController;

@RestController
@RequestMapping("/consumer")
public class ConsumerController {

	@Value("${server.port}")
	String port;

	//动态代理对象,内部远程调用服务生产者
	@Autowired
	ProviderClient providerClient;

	@GetMapping("/service")
	public String service() {
		//远程调用
		String providerResult = providerClient.service();
		String result = "consumer invoke: " + port + " | " + providerResult;
		System.out.println("****************" + result);
		return result;

	}
}

        best-nacos-demo
        org.example
        1.0-SNAPSHOT

    4.0.0

    gateway


            org.springframework.cloud
            spring-cloud-starter-gateway


            com.alibaba.cloud
            spring-cloud-starter-alibaba-nacos-discovery
server:
  port: 9081

spring:
  application:
    name: cloud-gateway
  cloud:
    nacos:
      discovery:
        server-addr: 127.0.0.1:8848
    gateway:
      discovery:
        locator:
          enabled: true  # 让gateway可以发现nacos中的微服务
      routes: # 路由数组,路由就是指定当请求满足什么条件的时候,转到 哪个微服务
        - id: provider  # 路由的Id,没有固定规则,但要求唯一,建议配合服务名
#          uri: http://localhost:9083 # 匹配后,请求转发到的地址
          uri: lb://provider # lb指的是从nacos中按照名称获取微服务,并遵循负载均衡策略
          predicates: # 断言:就是路由转发要满足的条件
            - Path=/provider/** # 当请求路径满足Path指定的规则时,才进行路由转发

        - id: consumer
#          uri: http://localhost:9084
          uri: lb://consumer # lb 指的是负载均衡,后面跟的是具体微服务在nacos中的标识
          predicates:
            - Path=/prefix/consumer/**
          filters: # 过滤器(在请求传递过程中,对请求做一些手脚)
- StripPrefix=1 # 在请求转发之前去掉一层路径,http://localhost:9081/prefix/consumer/service,实际请求会去掉prefixpackage com.best.nacos;
import org.springframework.boot.SpringApplication;
import org.springframework.boot.autoconfigure.SpringBootApplication;
import org.springframework.cloud.client.discovery.EnableDiscoveryClient;
@SpringBootApplication
@EnableDiscoveryClient
public class NacosGatewayApplication {
public static void main(String[] args) {
SpringApplication.run(NacosGatewayApplication.class, args);
}
}
依次启动,nacos、provider、consumer、gateway


三个服务都已注册进nacos服务注册中心,其中,provider和consumer各有两个实例
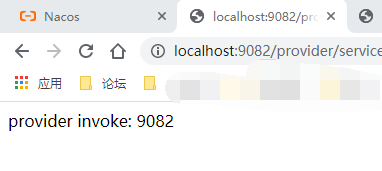
5.3 接口测试 5.3.1 测试providerhttp://localhost:9083/provider/service
http://localhost:9082/provider/service
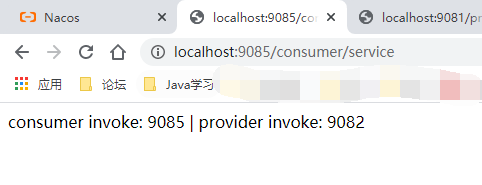
http://localhost:9084/consumer/service
http://localhost:9085/consumer/service
provider
http://localhost:9081/provider/service


实例9082/9083,轮询访问
consumer
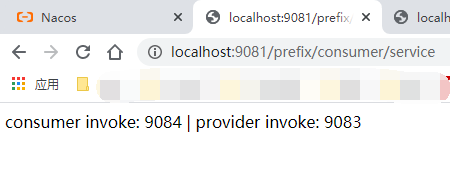

实例9084/9085,轮询访问
六、上下线及权重设置 6.1 上下线设置点击详情

将9084下线

consumer不再访问9084,只能访问9085

同时下线两个实例,9084,9085,再次通过gateway访问,页面报错,两个实例都访问不到


6.2 权重测试
将9084实例,权重设置为0,流量则不会进入该实例,此时只能访问9085


将9084/9085两个实例,权重同时设置为0,则这两个实例都不会进入流量,页面报错


总结,根据nacos这个特性,可以实现生产上的不停机发布。当想升级一个版本时,可以先将该实例下线,等升级完成后,再上线,完成服务的不停机发布。
Nacos控制台手册
源码地址