
1、Swagger是什么
Swagger 是一套基于 OpenAPI 规范(OpenAPI Specification,OAS)构建的开源工具。
Swagger工具的强大功能始于OpenAPI规范— RESTful API设计的行业标准
Swagger 提供了一套通过代码和注解自动生成可视化 的RESTful 风格的API文档。
OAS本身是一个API规范,它用于描述一整套API接口,包括一个接口是哪种请求方式、哪些参数、哪些header等,都会被包括在这个文件中。它在设计的时候通常是YAML格式,这种格式书写起来比较方便,而在网络中传输时又会以json形式居多,因为json的通用性比较强。
2、Swagger的作用
- 1. Rest API文档的在线自动生成。
- 2. 功能测试。
3、Swagger 主要提供了几种开源工具,提供相应的功能
- Swagger Codegen: 通过Codegen 可以将描述文件生成html格式和cwiki形式的接口文档,同时也能生成多钟语言的服务端和客户端的代码。支持通过jar包,docker,node等方式在本地化执行生成。也可以在后面的Swagger Editor中在线生成。
- Swagger UI:提供了一个可视化的UI页面展示描述文件。接口的调用方、测试、项目经理等都可以在该页面中对相关接口进行查阅和做一些简单的接口请求。该项目支持在线导入描述文件和本地部署UI项目。
- Swagger Editor: 基于浏览器的编辑器,该编辑支持实时预览描述文件的更新效果。也提供了在线编辑器和本地部署编辑器两种方式。
- Swagger Inspector: 感觉和postman差不多,是一个可以对接口进行测试的在线版的postman。比在Swagger UI里面做接口请求,会返回更多的信息,也会保存你请求的实际请求参数等数据。
- Swagger Hub:集成了上面所有项目的各个功能,你可以以项目和版本为单位,将你的描述文件上传到Swagger Hub中。在Swagger Hub中可以完成上面项目的所有工作,需要注册账号,分免费版和收费版。
4、Springfox介绍
由于Spring的流行,Marty Pitt编写了一个基于Spring的组件swagger-springmvc,用于将Swagger集成到SpringMVC中来,而Springfox则是从这个组件发展而来。
通常SpringBoot项目整合Swagger2需要用到两个依赖:springfox-swagger2和springfox-swagger-ui,用于自动生成swagger文档。
- springfox-swagger2:这个组件的功能用于帮助我们自动生成描述API的json文件
- springfox-swagger-ui:就是将描述API的json文件解析出来,用一种更友好的方式呈现出来。
5、Swagger常用注解
更多注解和使用说明,请查看Github:https://github.com/swagger-api/swagger-core/wiki/Annotations
@Api:用在请求的类上,表示对类的说明
	tags="说明该类的作用,可以在UI界面上看到的注解"
	value="该参数没什么意义,在UI界面上也看到,所以不需要配置"
@ApiOperation:用在请求的方法上,说明方法的用途、作用
  	value="说明方法的用途、作用"
	notes="方法的备注说明"
@ApiImplicitParams:用在请求的方法上,表示一组请求参数说明,
@ApiImplicitParam:用在请求的方法上,指定一个请求参数说明。也可以用在@ApiImplicitParams注解中,表示一组请求参数说明。
	name:参数名
	value:说明参数的意思
	dataType:参数类型,默认String,其它值dataType="Integer"
	required:参数是否必须传(true | false)
	defaultValue:参数的默认值
	paramType:指定参数放在哪个地方
		header:请求参数放置于Request Header,使用@RequestHeader获取
		query:请求参数放置于请求地址,使用@RequestParam获取
		 path:(用于restful接口)-->请求参数的获取:@PathVariable
		body:(不常用)
		form(不常用)
@ApiResponses:用在请求的方法上,表示一组响应信息
	@ApiResponse:用在@ApiResponses中,一般用于表达一个错误的响应信息
		code:数字,例如400
		message:信息,例如"请求参数异常!"
		response:抛出异常的类
@ApiModel:用于pojo类上,描述一个Model的信息
(一般用在请求参数无法使用@ApiImplicitParam注解进行描述的时候,比如使用@RequestBody这样的场景)
@ApiModelProperty:用在属性上,描述一个model的属性
@ApiIgnore  注解类、参数、方法,注解后将不在Swagger UI中显示
二、整合Swagger2
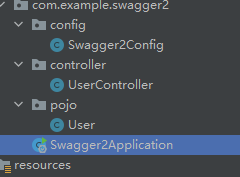
1、创建SpringBoot项目,引入依赖
            org.springframework.boot
            spring-boot-starter-web


            io.springfox
            springfox-swagger2
            2.9.2


            io.springfox
            springfox-swagger-ui
            2.9.2
2、创建Swagger2配置类
配置类中,通过@EnableSwagger2注解启用Swagger2,然后提供一个Docket的Bean即可。
这个Docket Bean中,配置映射路径和要扫描的接口的位置等信息,在apiInfo中,主要配置一下API文档网站的信息,例如:网站的title,网站的描述,联系人的信息,使用的协议等等。
访问地址:http://项目实际地址/swagger-ui.html
@Configuration
@EnableSwagger2
public class Swagger2Config {

    /**
     * 创建API应用
     * @return
     */
    @Bean
    public Docket createRestApi() {
        return new Docket(DocumentationType.SWAGGER_2)
                .pathMapping("/") // 设置api根路径
                .select() // 返回一个ApiSelectorBuilder实例,用来控制哪些接口暴露给Swagger来展现。
                .apis(RequestHandlerSelectors.basePackage("com.example.swagger2.controller")) // 指定扫描的包路径来定义指定要建立API的目录。
                .paths(PathSelectors.any()) // 指定扫描的包路径下的那些path,比如:PathSelectors.ant("/api/v1/**")。这里是所有
                .build()
                .apiInfo(apiInfo("全局接口文档"));// 创建该API的基本信息
    }

    /**
     * 创建该API的基本信息(这些基本信息会展现在文档页面中)
     * @return
     */
    private ApiInfo apiInfo(String desc) {
        return new ApiInfoBuilder()
                .title("SpringBoot中使用Swagger2构建RESTful APIs")
                .description(desc)
                .contact(new Contact("xxx项目","http://127.0.0.1:8080/",null))
//                .termsOfServiceUrl("http://127.0.0.1:8080/")
                .version("V1.0")
                .license("The Apache License") //指定使用的协议和协议url,可选
                .licenseUrl("http://www.baidu.com")
                .build();
    }

}
3、使用Swagger提供的注解
@ApiModel
public class User {
    private Integer id;

    @ApiModelProperty(value = "用户名")
    private String username;

    @ApiModelProperty(value = "生日")
    private LocalDate birthday;

    @ApiModelProperty(value = "地址")
    private String address;

}
@RestController
@Api(tags = "用户管理相关接口")
@RequestMapping("/user")
public class UserController {
@PostMapping("/add")
@ApiOperation(value = "添加用户", notes = "添加用户接口")
public User add(@RequestBody User user) {
return user;
}
@DeleteMapping("/{id}")
@ApiOperation("根据id删除用户的接口")
@ApiImplicitParam(name = "id", value = "用户id", dataType = "Integer", defaultValue = "10", required = true)
@ApiResponses({
@ApiResponse(code = 200, message = "删除成功"),
@ApiResponse(code = 500, message = "删除成功")
})
public void delete(@PathVariable Integer id) {
System.out.println("删除成功:" + id);
}
@PutMapping("/update/{id}")
@ApiOperation(value = "更新用户", notes = "根据用户id更新用户名接口")
@ApiImplicitParams({
@ApiImplicitParam(name = "id", value = "用户id", dataType = "Integer", defaultValue = "10", required = true),
@ApiImplicitParam(name = "username", value = "用户名", dataType = "String", defaultValue = "lisi", required = true)
})
public User update(@PathVariable Integer id, String username) {
User user = new User();
user.setId(id);
user.setUsername(username);
return user;
}
@GetMapping("/{id}")
@ApiOperation("根据id查询用户的接口")
@ApiImplicitParam(name = "id", value = "用户id", dataType = "Integer", defaultValue = "10", required = true)
@ApiIgnore
public User get(@PathVariable Integer id) {
User user = new User();
user.setId(id);
user.setUsername("赵云");
user.setBirthday(LocalDate.now());
return user;
}
}4、启动项目,访问 http://项目实际地址/swagger-ui.html


三、整合Swagger3
兼容性说明:
-
需要Java 8
-
需要Spring5.x
-
需要SpringBoot 2.2+
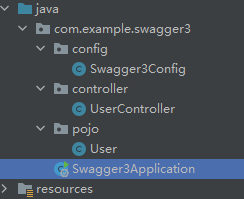
1、创建SpringBoot项目,引入springfox-boot-starter依赖
            org.springframework.boot
            spring-boot-starter-web


            io.springfox
            springfox-boot-starter
            3.0.0
2、启动类上增加注解 @EnableOpenApi
@SpringBootApplication
@EnableOpenApi
public class Swagger3Application {

    public static void main(String[] args) {
        SpringApplication.run(Swagger3Application.class, args);
    }

}
3、创建 Swagger2配置类 application.yml配置
@Configuration
public class Swagger3Config {
    /**
     * 创建API应用
     * @return
     */
    @Bean
    public Docket createRestApi() {
        return new Docket(DocumentationType.OAS_30) // 注意这里不同
                .pathMapping("/")
                .select()
                .apis(RequestHandlerSelectors.basePackage("com.example.swagger3.controller"))
                .paths(PathSelectors.any())
                .build()
                .apiInfo(apiInfo("全局接口文档"));
    }

    /**
     * 创建该API的基本信息(这些基本信息会展现在文档页面中)
     * @return
     */
    private ApiInfo apiInfo(String desc) {
        return new ApiInfoBuilder()
                .title("SpringBoot中使用Swagger3构建RESTful APIs")
                .description(desc)
                .contact(new Contact("xxx项目","http://127.0.0.1:8080/",null))
                .version("V1.0")
                .build();
    }
}
4、使用Swagger提供的注解同上
5、启动项目
访问地址:http://项目实际地址/swagger-ui/index.html 或者 http:/项目实际地址/swagger-ui/
注意:2.x版本中访问的地址的为:http://项目实际地址//swagger-ui.html 
参考文章:
Swagger官网 :http://swagger.io/
Github:https://github.com/swagger-api/swagger-core/wiki/Annotations
https://mp.weixin.qq.com/s/-2mEdZJmrstsFBYbn4i47A
—— Stay Hungry. Stay Foolish. 求知若饥,虚心若愚。

