
七牛云对象存储 Kodo 是七牛云提供的高可靠、强安全、低成本、可扩展的存储服务。您可通过控制台、API、SDK 等方式简单快速地接入七牛存储服务,实现海量数据的存储和管理。通过 Kodo 可以进行文件的上传、下载和管理。
2、基本概念 2.1 空间空间是资源的组织管理单位,一个资源必然位于某个空间中。可以为每个空间设置一系列的属性,以对资源提供合理的管理动作。
空间提供两种访问控制:公开空间和私有空间。 公开和私有仅对空间的读文件生效,修改、删除、写入等对空间的操作均需要拥有者的授权才能进行操作。空间访问控制可通过对象存储控制台空间设置的访问控制修改。
- 公开空间:可通过文件对象的 URL 直接访问。
- 私有空间:文件对象的访问则必须获得拥有者的授权才能访问。
资源是七牛云存储服务中的逻辑存储单元。对于每一个账号,该账号里存放的每个资源都有唯一的空间与键(Key)标识。资源名称是一个字符串,例如level1/level2/example1.jpg,它可以是任意字符包括 UTF-8 编码形式的 Unicode 字符。
2.3 存储区域存储区域是在创建空间时指定的,一旦指定后就无法修改。存储区域表示七牛云对象存储服务的数据中心所在区域。
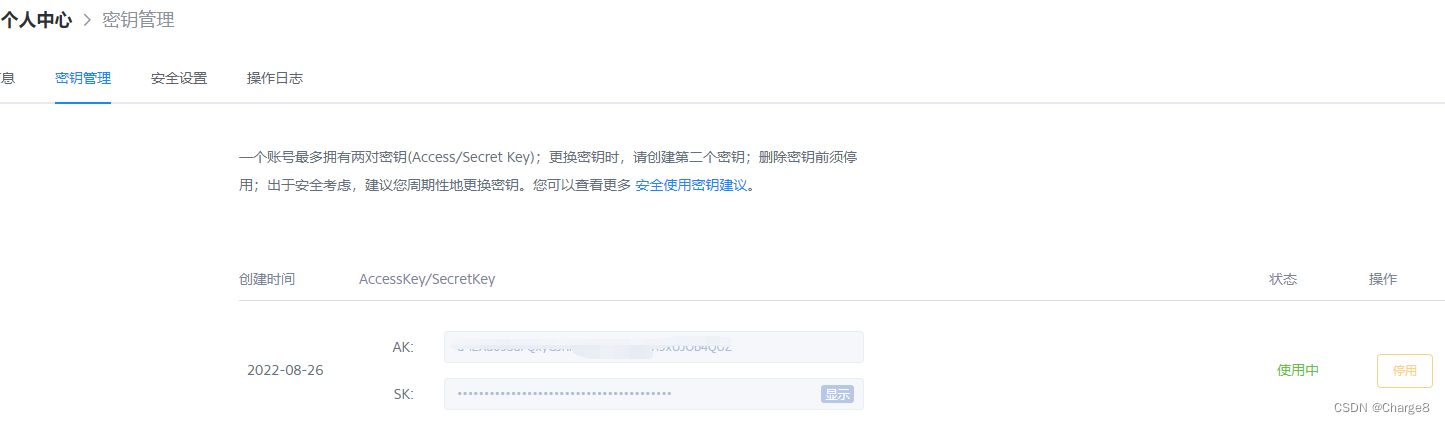
2.4 访问密钥AccessKey . SecretKey 合称为七牛云的密钥,用于对操作请求进行签名验证。一个账号最多拥有两对密钥,用于不同的访问。
- AccessKey: 用于标识用户,用户将 AccessKey 放入访问请求,以便七牛云存储识别访问者的身份。
- SecretKey: 是用于加密签名字符串和服务器端验证签名字符串的密钥。
上面信息基本来自官方介绍(https://developer.qiniu.com/kodo/1277/product-introduction)。
二、快速入门 1、注册账号并实名认证我们需要注册一个七牛云账号。 注册完成之后,我们需要进行实名认证。认证之后我们可以免费额度永久享用。官方是这么说的。
官方注册/登陆:https://portal.qiniu.com/
登录控制台界面如下: 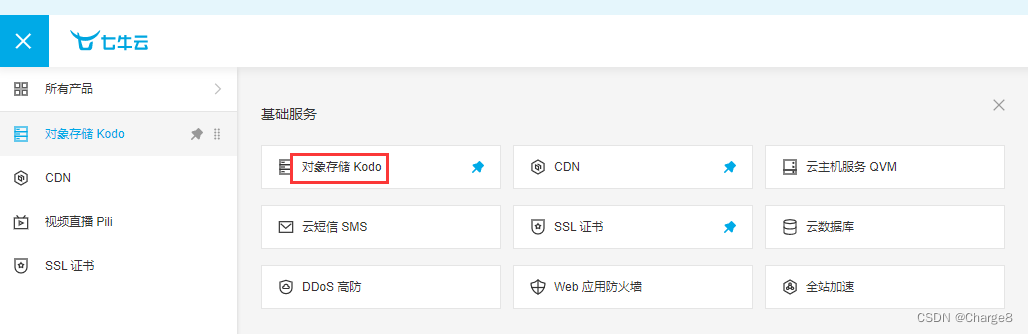 然后就可以使用了,七牛云的控制台操作蛮简单的,自行操作。
官方文档-控制台指南:https://developer.qiniu.com/kodo/8452/kodo-console-guide
三、Java整合七牛云对象存储Kodo引入依赖:
            com.qiniu
            qiniu-java-sdk
            7.11.0


            com.squareup.okhttp3
            okhttp
            3.14.4


            com.google.code.gson
            gson
            2.8.5
在个人中心下的密钥管理中获取到自己的访问密钥.
注意:
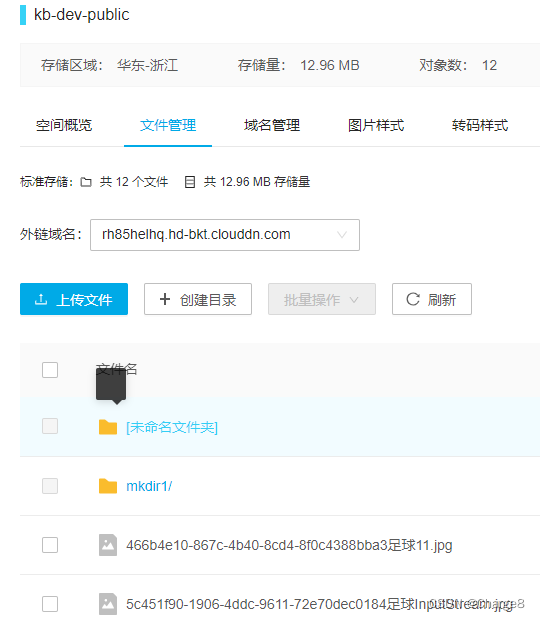
- 空间桶必须在七牛云控制台中创建。在 Java代码中指定了未创建的空间桶时,操作会报错。
官方 Java SDK文档: https://developer.qiniu.com/kodo/1239/java#1
	public static String accessKey = "your access key";
	public static String secretKey = "your secret key";
	public static String bucket = "kb-dev-public"; //空间桶名
	@Test
	public void uploadByLocalFilePath() {
		// 1、构造一个带指定 Region 对象的配置类。指定存储区域,和存储空间选择的区域一致
		Configuration cfg = new Configuration(Region.region0());
		// ...其他参数参考类注释

		UploadManager uploadManager = new UploadManager(cfg);
		// 2、认证
		Auth auth = Auth.create(accessKey, secretKey);
		// 认证通过后得到 token(令牌)认证凭证
		String upToken = auth.uploadToken(bucket);

		try {
			/**
			 * 3、文件上传 String filePath:文件路径
			 * String key:文件名,
			 * - 默认不指定key的情况下,以文件内容的hash值作为文件名
			 * - 默认文件名存在桶中时,不覆盖
			 * String token:认证凭证
			 */
			String localFilePath = "D:\\TempFiles\\足球11.jpg";
			String key = UUID.randomUUID() + "足球file.jpg";
			Response response = uploadManager.put(localFilePath, key, upToken);
			// 4、解析上传成功的结果
			DefaultPutRet putRet = new Gson().fromJson(response.bodyString(), DefaultPutRet.class);
			System.out.println("文件名:" + putRet.key);
			System.out.println("文件内容的hash值:" + putRet.hash);
		} catch (QiniuException ex) {
			Response r = ex.response;
			System.err.println(r.toString());
			try {
				System.err.println(r.bodyString());
			} catch (QiniuException ex2) {
				// ignore
			}
		}
	}
步骤都是类似的,这里只贴一下上传这块的代码。
		    UploadManager uploadManager = new UploadManager(cfg);
			/**
			 * 3、字节数组上传 byte[] data:字节数据
			 * String key:文件名,
			 * - 默认不指定key的情况下,以文件内容的hash值作为文件名
			 * - 默认文件名存在桶中时,不覆盖
			 * String token:认证凭证
			 */
			String localFilePath = "D:\\TempFiles\\足球11.jpg";
			byte[] uploadBytes = IOUtils.toByteArray(new FileInputStream(localFilePath));
			String key = "mkdir2/"+ UUID.randomUUID() + "足球byte.jpg";
			Response response = uploadManager.put(uploadBytes, key, upToken);
			// 4、解析上传成功的结果
			UploadManager uploadManager = new UploadManager(cfg);
			/**
			 * 3、数据流上传 InputStream stream:数据流
			 * String key:文件名,
			 * - 默认不指定key的情况下,以文件内容的hash值作为文件名
			 * - 默认文件名存在桶中时,不覆盖
			 * String token:认证凭证
			 * StringMap params: String mime:
			 */
			String localFilePath = "D:\\TempFiles\\足球11.jpg";
			byte[] uploadBytes = IOUtils.toByteArray(new FileInputStream(localFilePath));
			ByteArrayInputStream uploadInputStream = new ByteArrayInputStream(uploadBytes);
			String key = UUID.randomUUID() + "足球InputStream.jpg";
			Response response = uploadManager.put(uploadInputStream, key, upToken, null, null);
			// 4、解析上传成功的结果
分片上传中 uploadManager.put()方法可以使用上面的任意一种。
	@Test
	public void uploadByResumableV2() {
		// 1、构造一个带指定 Region 对象的配置类。指定存储区域,和存储空间选择的区域一致
		Configuration cfg = new Configuration(Region.region0());
		// 指定分片上传版本
		cfg.resumableUploadAPIVersion = Configuration.ResumableUploadAPIVersion.V2;
		// 设置分片上传并发,1:采用同步上传;大于1:采用并发上传
		cfg.resumableUploadMaxConcurrentTaskCount = 2;

		// 2、认证
		Auth auth = Auth.create(accessKey, secretKey);
		// 认证通过后得到 token(令牌)认证凭证
		String upToken = auth.uploadToken(bucket);

		try {
			// 设置断点续传文件进度保存目录
			String localTempDir = "D:\\TempFiles\\tempDir";
			FileRecorder fileRecorder = new FileRecorder(localTempDir);
			UploadManager uploadManager = new UploadManager(cfg, fileRecorder);
			/**
			 * 3、分片上传 v2 版
			 * InputStream stream:数据流
			 * String key:文件名,
			 * - 默认不指定key的情况下,以文件内容的hash值作为文件名
			 * - 默认文件名存在桶中时,不覆盖
			 * String token:认证凭证
			 * StringMap params: String mime:
			 */
			String localFilePath = "D:\\TempFiles\\flashcenter_pp_ax_install_cn.exe";
			byte[] uploadBytes = IOUtils.toByteArray(new FileInputStream(localFilePath));
			ByteArrayInputStream uploadInputStream = new ByteArrayInputStream(uploadBytes);
			String key = UUID.randomUUID() + "flashcenter_pp_ax_install_cn.exe";
			Response response = uploadManager.put(uploadInputStream, key, upToken, null, null);
			// 4、解析上传成功的结果
			DefaultPutRet putRet = new Gson().fromJson(response.bodyString(), DefaultPutRet.class);
			System.out.println("文件名:" + putRet.key);
			System.out.println("文件内容的hash值:" + putRet.hash);
		} catch (QiniuException ex) {
			Response r = ex.response;
			System.err.println(r.toString());
			try {
				System.err.println(r.bodyString());
			} catch (QiniuException ex2) {
				// ignore
			}
		} catch (IOException e) {
			e.printStackTrace();
		}
	}
	@Test
	public void uploadByRemoteSrcUrl() {
		// 1、构造一个带指定 Region 对象的配置类。指定存储区域,和存储空间选择的区域一致
		Configuration cfg = new Configuration(Region.region0());

		// 2、认证
		Auth auth = Auth.create(accessKey, secretKey);
		try {
			BucketManager bucketManager = new BucketManager(auth, cfg);
			/**
			 * 3、抓取网络资源上传
			 * String remoteSrcUrl:网络资源url
			 * String bucket:桶名
			 * String key:文件名,
			 * - 默认不指定key的情况下,以文件内容的hash值作为文件名
			 * - 默认文件名存在桶中时,不覆盖
			 */
			String remoteSrcUrl = "http://devtools.qiniu.com/qiniu.png";
			String key = UUID.randomUUID().toString();
			FetchRet fetchRet = bucketManager.fetch(remoteSrcUrl, bucket, key);
			// 4、解析上传成功的结果
			System.out.println(fetchRet.hash);
			System.out.println(fetchRet.key);
			System.out.println(fetchRet.mimeType);
			System.out.println(fetchRet.fsize);
		} catch (QiniuException ex) {
			Response r = ex.response;
			System.err.println(r.toString());
			try {
				System.err.println(r.bodyString());
			} catch (QiniuException ex2) {
				// ignore
			}
		} catch (IOException e) {
			e.printStackTrace();
		}
	}
在七牛云控制台中的空间管理中,我们
- 可以先创建目录,然后将上传文件指定到该目录下即可。
- 也可以在 Java中上传文件时可以直接指定到目录下,如果目录不存在时,会自动创建。
//指明文件存储的目录
String key = "mkdir1/"+ UUID.randomUUID() + "足球byte.jpg";
注意:千万不要首位加 "/",否则就就创建一个未命名的目录,它里面才是我们的mkdir1目录。
	@Test
	public void getFileList() {
		// 1、构造一个带指定 Region 对象的配置类。
		Configuration cfg = new Configuration(Region.huadong());
		// ...其他参数参考类注释

		// 2、认证
		Auth auth = Auth.create(accessKey, secretKey);

		BucketManager bucketManager = new BucketManager(auth, cfg);
		/**
		 * 3、列举空间文件列表
		 * String bucket:桶名
		 * String prefix:文件名前缀
		 * int limit:每次迭代的长度限制,最大1000,推荐值 1000
		 * String delimiter:指定目录分隔符,列出所有公共前缀。缺省值为空字符串
		 */
		String prefix = "";
		int limit = 1000;
		String delimiter = "";
		BucketManager.FileListIterator fileListIterator = bucketManager.createFileListIterator(bucket, prefix, limit, delimiter);
		while (fileListIterator.hasNext()) {
			// 处理获取的file list结果
			FileInfo[] items = fileListIterator.next();
			for (FileInfo item : items) {
				System.out.println(item.key);
				System.out.println(item.hash);
				System.out.println(item.fsize);
				System.out.println(item.mimeType);
				System.out.println(item.putTime);
				System.out.println(item.endUser);
			}
		}
	}
	@Test
	public void getFileInfo() {
		// 1、构造一个带指定 Region 对象的配置类。
		Configuration cfg = new Configuration(Region.huadong());
		// ...其他参数参考类注释

		// 2、认证
		Auth auth = Auth.create(accessKey, secretKey);
		try {
			BucketManager bucketManager = new BucketManager(auth, cfg);
			/**
			 * 3、通过文件名获取文件信息
			 * String bucket:桶名
			 * String key:文件名
			 */
			String key = "f1b17e57-3233-482f-bdf9-6d988cd85ba6足球byte.jpg";
			FileInfo fileInfo = bucketManager.stat(bucket, key);
			System.out.println(fileInfo.hash);
			System.out.println(fileInfo.fsize);
			System.out.println(fileInfo.mimeType);
			System.out.println(fileInfo.putTime);
		} catch (QiniuException ex) {
			// 如果遇到异常,说明删除失败
			System.err.println(ex.code());
			System.err.println(ex.response.toString());
		}
	}
下面是私有空间的写法,其实真是公开空间也是可用的。
	@Test
	public void download() throws UnsupportedEncodingException {
		// 1、构建文件名.空间目录下可以直接写文件,如果有目录需要带上目录名。
		// String fileName = "f1b17e57-3233-482f-bdf9-6d988cd85ba6足球byte.jpg";
		String fileName = "/mkdir1/nan.jpeg";
		// 空间管理中的CDN
		String domainOfBucket = "http://xxx.com";
		String encodedFileName = null;
		try {
			encodedFileName = URLEncoder.encode(fileName, "utf-8").replace("+", "%20");
		} catch (UnsupportedEncodingException e) {
			e.printStackTrace();
		}
		String publicUrl = String.format("%s/%s", domainOfBucket, encodedFileName);

		// 2、认证
		Auth auth = Auth.create(accessKey, secretKey);
		// 自定义链接过期时间。1小时
		long expireInSeconds = 3600;
		// 3.生成下载url
		String finalUrl = auth.privateDownloadUrl(publicUrl, expireInSeconds);
		System.out.println(finalUrl);

	}
	@Test
	public void delete() {
		// 1、构造一个带指定 Region 对象的配置类。
		Configuration cfg = new Configuration(Region.huadong());
		// ...其他参数参考类注释

		// 2、认证
		Auth auth = Auth.create(accessKey, secretKey);
		try {
			BucketManager bucketManager = new BucketManager(auth, cfg);
			/**
			 * 3、通过文件名删除
			 * String bucket:桶名
			 * String key:文件名
			 */
			String key = "FjxGOpcOSP9YHM_KYRoTYO3s1hcn";
			bucketManager.delete(bucket, key);
		} catch (QiniuException ex) {
			// 如果遇到异常,说明删除失败
			System.err.println(ex.code());
			System.err.println(ex.response.toString());
		}
	}
– 求知若饥,虚心若愚。

