ImageView 官方文档
ImageView 继承自 View 的组件,主要功能是用于显示图片,实际上它不仅仅可以用来显示图片,任何 Drawable 对象都可以使用 ImageView 来显示。
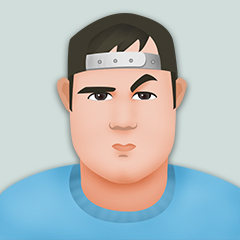
一. 基本使用
1. 效果图
2. 布局文件
3. 动态设置图片
public class TestActivity extends BaseActivity {
    @BindView(R.id.iv_image)
    ImageView mImageView;

    @Override
    public int getLayoutId() {
        return R.layout.activity_test;
    }

    @Override
    public void initView() {
        mImageView.setImageBitmap(BitmapUtil.getBitmapFromDrawable(getResources().getDrawable(R.mipmap.ic_avatar)));
    }
}
二、图片倒影实现
1. 布局文件
2. 代码逻辑
public class TestActivity extends BaseActivity {
    @BindView(R.id.iv_image2)
    ImageView mImageView2;

    @Override
    public int getLayoutId() {
        return R.layout.activity_test;
    }

    @Override
    public void initView() {
        Bitmap bitmap = BitmapUtil.getBitmapFromDrawable(getResources().getDrawable(R.mipmap.meizi));
        mImageView2.setImageBitmap(BitmapUtil.createReflectionBitmap(bitmap));
    }
}
三、图片圆角实现
1. 布局文件
2. 逻辑代码
public class TestActivity extends BaseActivity {
    @BindView(R.id.iv_image3)
    ImageView mImageView3;

    @Override
    public int getLayoutId() {
        return R.layout.activity_test;
    }

    @Override
    public void initView() {
        Bitmap bitmap = BitmapUtil.getBitmapFromDrawable(getResources().getDrawable(R.mipmap.meizi));
        mImageView3.setImageBitmap(BitmapUtil.getRoundedCornerBitmap(bitmap,60.0f));
    }
}
四、实现怀旧照片
1. 布局文件
2. 逻辑代码
public class TestActivity extends BaseActivity {
    @BindView(R.id.iv_image2)
    ImageView mImageView2;


    @Override
    public int getLayoutId() {
        return R.layout.activity_test;
    }

    @Override
    public void initView() {
        Bitmap bitmap = BitmapUtil.getBitmapFromDrawable(getResources().getDrawable(R.mipmap.meizi));
        mImageView2.setImageBitmap(BitmapUtil.convertToBlackWhite(bitmap));
    }
}
BitmapUtil 工具类
/**
* Created on 2021/7/14 16:46
*
* @author Gong Youqiang
*/
public class BitmapUtil {
private static final boolean DEBUG = false;
private static final String TAG = BitmapUtil.class.getSimpleName();
/**
* Don't let anyone instantiate this class.
*/
private BitmapUtil() {
throw new Error("Do not need instantiate!");
}
/**
* 图片压缩处理(使用Options的方法)
*
*
* 说明 使用方法:
* 首先你要将Options的inJustDecodeBounds属性设置为true,BitmapFactory.decode一次图片 。
* 然后将Options连同期望的宽度和高度一起传递到到本方法中。
* 之后再使用本方法的返回值做参数调用BitmapFactory.decode创建图片。
*
*
* 说明 BitmapFactory创建bitmap会尝试为已经构建的bitmap分配内存
* ,这时就会很容易导致OOM出现。为此每一种创建方法都提供了一个可选的Options参数
* ,将这个参数的inJustDecodeBounds属性设置为true就可以让解析方法禁止为bitmap分配内存
* ,返回值也不再是一个Bitmap对象, 而是null。虽然Bitmap是null了,但是Options的outWidth、
* outHeight和outMimeType属性都会被赋值。
*
* @param reqWidth 目标宽度,这里的宽高只是阀值,实际显示的图片将小于等于这个值
* @param reqHeight 目标高度,这里的宽高只是阀值,实际显示的图片将小于等于这个值
*/
public static BitmapFactory.Options calculateInSampleSize(
final BitmapFactory.Options options, final int reqWidth,
final int reqHeight) {
// 源图片的高度和宽度
final int height = options.outHeight;
final int width = options.outWidth;
int inSampleSize = 1;
if (height > 400 || width > 450) {
if (height > reqHeight || width > reqWidth) {
// 计算出实际宽高和目标宽高的比率
final int heightRatio = Math.round((float) height
/ (float) reqHeight);
final int widthRatio = Math.round((float) width
/ (float) reqWidth);
// 选择宽和高中最小的比率作为inSampleSize的值,这样可以保证最终图片的宽和高
// 一定都会大于等于目标的宽和高。
inSampleSize = heightRatio = 0) {
os.write(buffer, 0, len);
}
} catch (IOException e) {
e.printStackTrace();
}
return os.toByteArray();
}
/**
* 获取一个指定大小的bitmap
*
* @param b Byte数组
* @return 需要的Bitmap
*/
public static Bitmap getBitmapFromBytes(byte[] b) {
if (b.length != 0) {
return BitmapFactory.decodeByteArray(b, 0, b.length);
} else {
return null;
}
}
/**
* 获取一个指定大小的bitmap
*
* @param is 从输入流中读取Bitmap
* @param outPadding If not null, return the padding rect for the bitmap if it
* exists, otherwise set padding to [-1,-1,-1,-1]. If no bitmap
* is returned (null) then padding is unchanged.
* @param reqWidth 目标宽度
* @param reqHeight 目标高度
*/
public static Bitmap getBitmapFromStream(InputStream is, Rect outPadding,
int reqWidth, int reqHeight) {
BitmapFactory.Options options = new BitmapFactory.Options();
options.inJustDecodeBounds = true;
BitmapFactory.decodeStream(is, outPadding, options);
options = calculateInSampleSize(options, reqWidth, reqHeight);
return BitmapFactory.decodeStream(is, outPadding, options);
}
/**
* 从View获取Bitmap
*
* @param view View
* @return Bitmap
*/
public static Bitmap getBitmapFromView(View view) {
Bitmap bitmap = Bitmap.createBitmap(view.getWidth(), view.getHeight(),
Config.ARGB_8888);
Canvas canvas = new Canvas(bitmap);
view.layout(view.getLeft(), view.getTop(), view.getRight(),
view.getBottom());
view.draw(canvas);
return bitmap;
}
/**
* 把一个View的对象转换成bitmap
*
* @param view View
* @return Bitmap
*/
public static Bitmap getBitmapFromView2(View view) {
view.clearFocus();
view.setPressed(false);
// 能画缓存就返回false
boolean willNotCache = view.willNotCacheDrawing();
view.setWillNotCacheDrawing(false);
int color = view.getDrawingCacheBackgroundColor();
view.setDrawingCacheBackgroundColor(0);
if (color != 0) {
view.destroyDrawingCache();
}
view.buildDrawingCache();
Bitmap cacheBitmap = view.getDrawingCache();
if (cacheBitmap == null) {
if (DEBUG) {
Log.e(TAG, "failed getViewBitmap(" + view + ")",
new RuntimeException());
}
return null;
}
Bitmap bitmap = Bitmap.createBitmap(cacheBitmap);
// Restore the view
view.destroyDrawingCache();
view.setWillNotCacheDrawing(willNotCache);
view.setDrawingCacheBackgroundColor(color);
return bitmap;
}
/**
* 将Drawable转化为Bitmap
*
* @param drawable Drawable
* @return Bitmap
*/
public static Bitmap getBitmapFromDrawable(Drawable drawable) {
int width = drawable.getIntrinsicWidth();
int height = drawable.getIntrinsicHeight();
Bitmap bitmap = Bitmap.createBitmap(width, height, drawable
.getOpacity() != PixelFormat.OPAQUE ? Config.ARGB_8888
: Config.RGB_565);
Canvas canvas = new Canvas(bitmap);
drawable.setBounds(0, 0, width, height);
drawable.draw(canvas);
return bitmap;
}
/**
* 合并Bitmap
* @param bgd 背景Bitmap
* @param fg 前景Bitmap
* @return 合成后的Bitmap
*/
public static Bitmap combineImages(Bitmap bgd, Bitmap fg) {
Bitmap bmp;
int width = bgd.getWidth() > fg.getWidth() ? bgd.getWidth() : fg
.getWidth();
int height = bgd.getHeight() > fg.getHeight() ? bgd.getHeight() : fg
.getHeight();
bmp = Bitmap.createBitmap(width, height, Config.ARGB_8888);
Paint paint = new Paint();
paint.setXfermode(new PorterDuffXfermode(Mode.SRC_ATOP));
Canvas canvas = new Canvas(bmp);
canvas.drawBitmap(bgd, 0, 0, null);
canvas.drawBitmap(fg, 0, 0, paint);
return bmp;
}
/**
* 合并
* @param bgd 后景Bitmap
* @param fg 前景Bitmap
* @return 合成后Bitmap
*/
public static Bitmap combineImagesToSameSize(Bitmap bgd, Bitmap fg) {
Bitmap bmp;
int width = bgd.getWidth()
关注
打赏